Electric and hybrid cars, trucks, and SUVs are becoming more popular. Many owners want to know how to maintain these advanced systems. Proper care helps extend the life of these vehicles and keeps them running smoothly.
Common Hybrid Vehicle Maintenance
Hybrid vehicles combine a gas engine with an electric motor to improve fuel efficiency. This advanced system requires specialized maintenance to perform at its best. Most importantly, regular service keeps key components running smoothly and prevents costly repairs
Oil Change – Every 5,000 to 7,500 Miles
Oil changes remain essential for hybrid engines. Most manufacturers recommend changing the oil every 5,000 to 7,500 miles, depending on driving conditions. Fresh oil reduces engine wear and keeps moving parts lubricated. However, skipping oil changes can lead to sludge buildup, which decreases performance and shortens engine life.
Battery Health Check – Every 5,000 to 7,500 Miles
Battery health checks ensure proper energy storage and delivery. A weak battery affects fuel efficiency and overall performance. Our Technicians inspect battery cooling fans and terminals to prevent overheating and corrosion. Hybrid batteries last many years, but regular monitoring helps catch issues early.
Transmission Fluid Change – Every 30,000 Miles
Transmission fluid changes extend the life of the hybrid’s transmission. Manufacturers often suggest replacing the fluid every 30,000 miles. Fresh fluid reduces friction, prevents overheating, and keeps gears shifting smoothly. Therefore, neglecting this service can lead to costly repairs or even transmission failure.
Coolant Exchange – Every 30,000 Miles
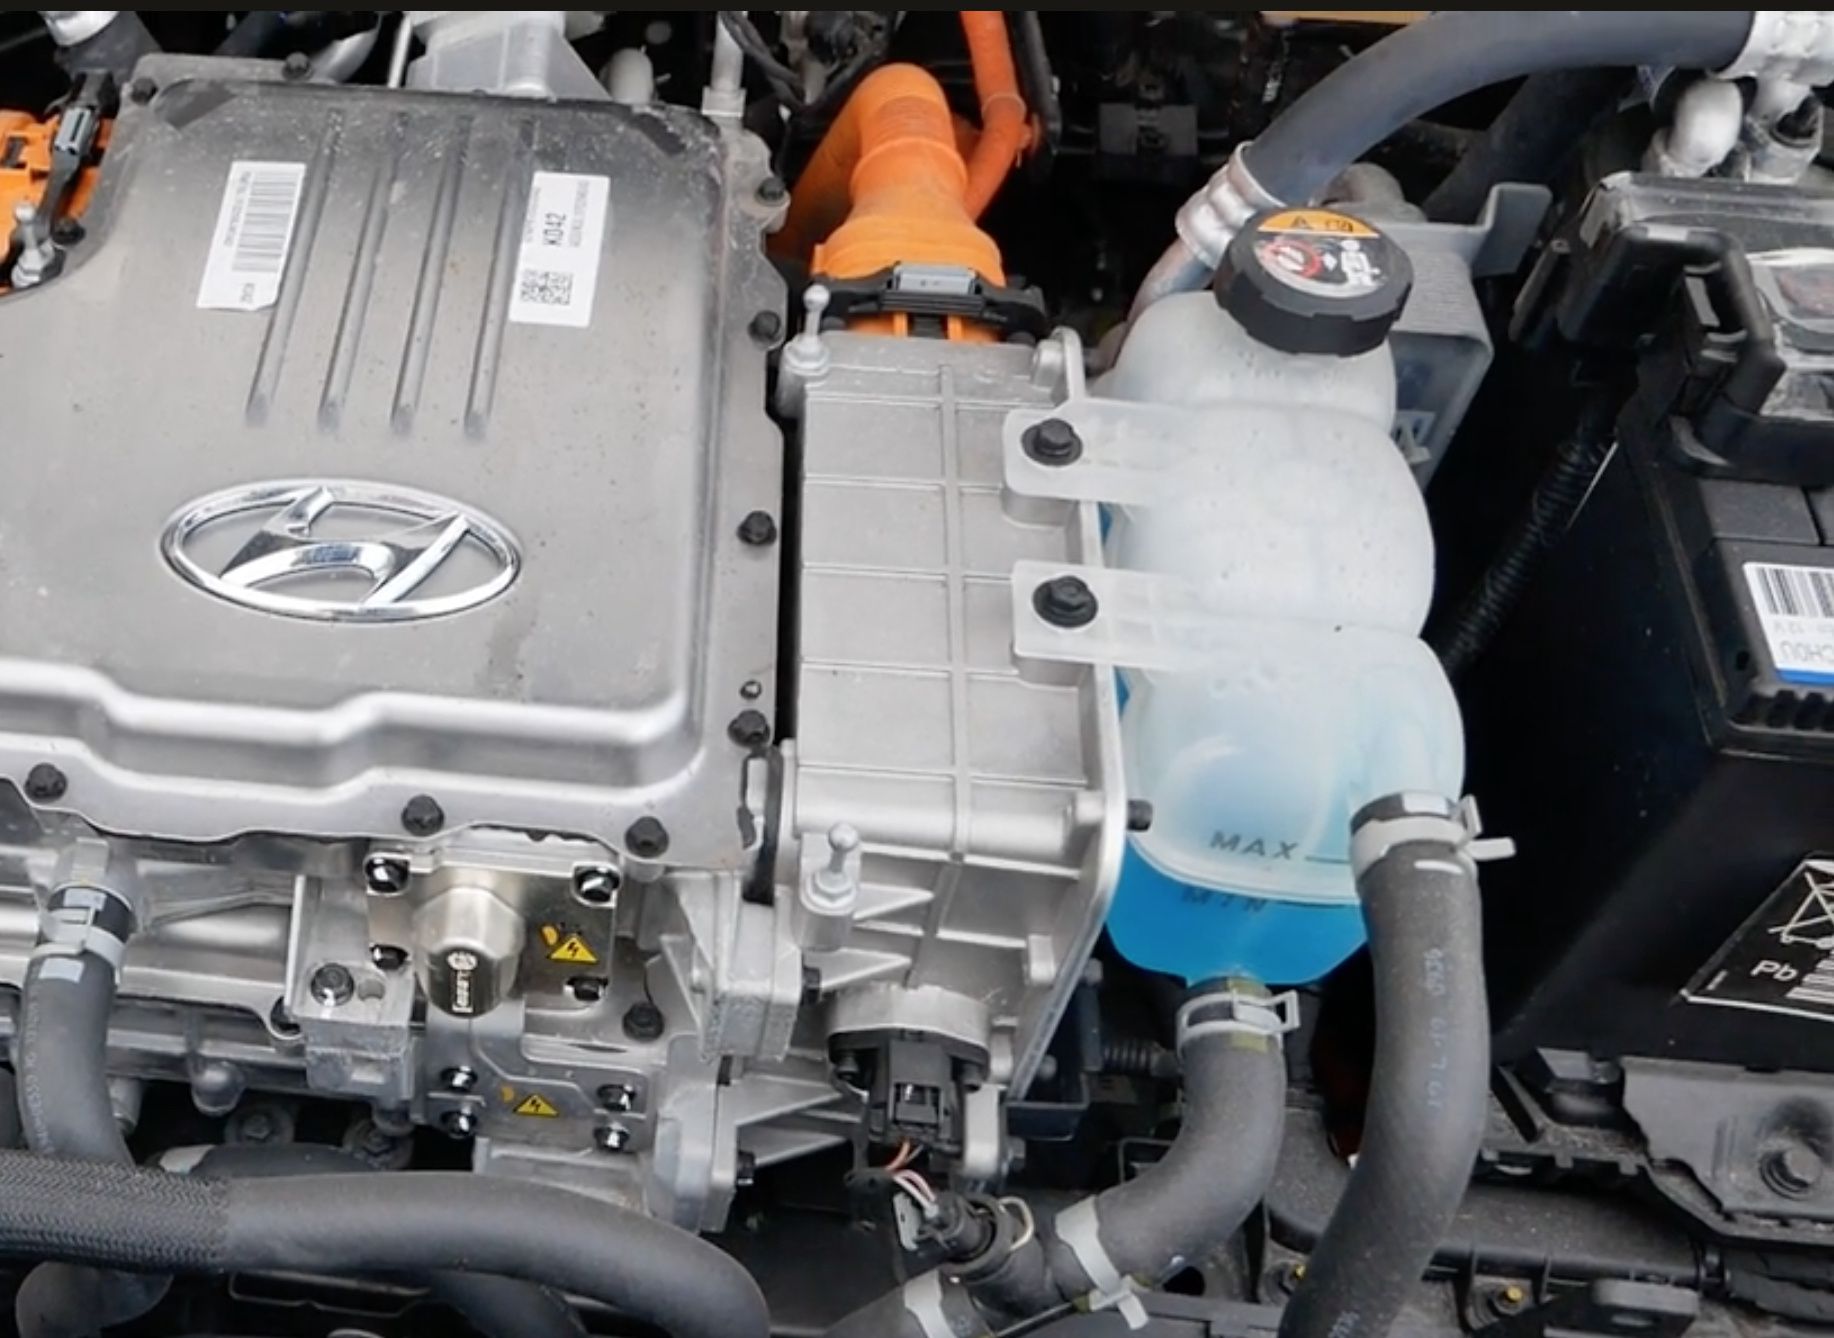
Cooling system inspections protect vital engine and battery components. Hybrid systems generate heat, so a properly functioning cooling system is critical. Our Technicians will check coolant levels, hoses, and radiators to prevent leaks and overheating. Additionally, replacing the coolant at recommended intervals, usually every 30,000 miles, helps maintain system efficiency.
Brake Fluid Change – Every 2 Years
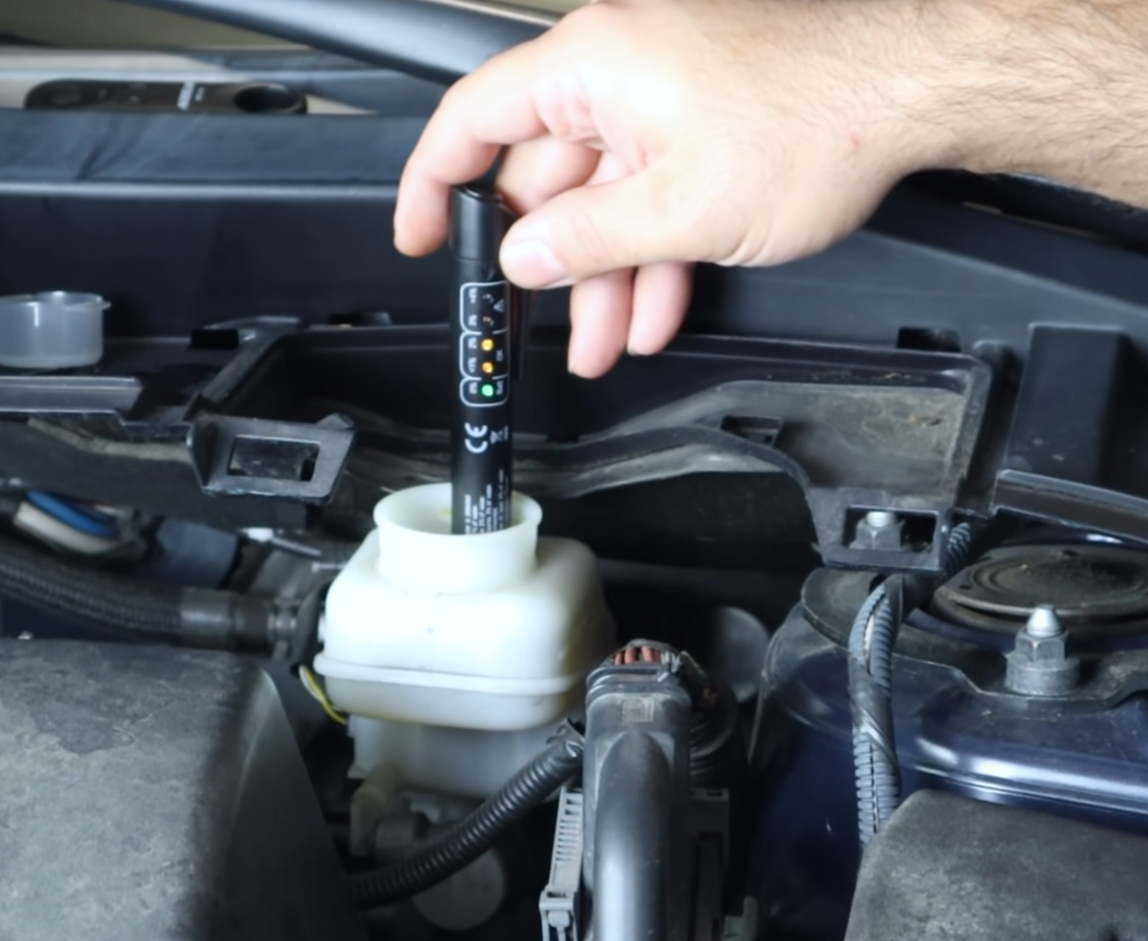
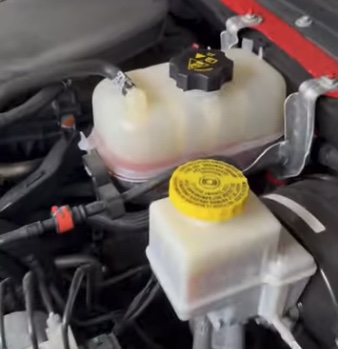
Brake fluid exchanges improve stopping power and increase brake system longevity. Over time, brake fluid absorbs moisture, which lowers braking efficiency and causes internal corrosion. Most manufacturers recommend a brake fluid flush every two years. This service keeps brakes responsive and prevents costly damage to the master cylinder and calipers.
Brake System Inspection – Every 10,000 Miles
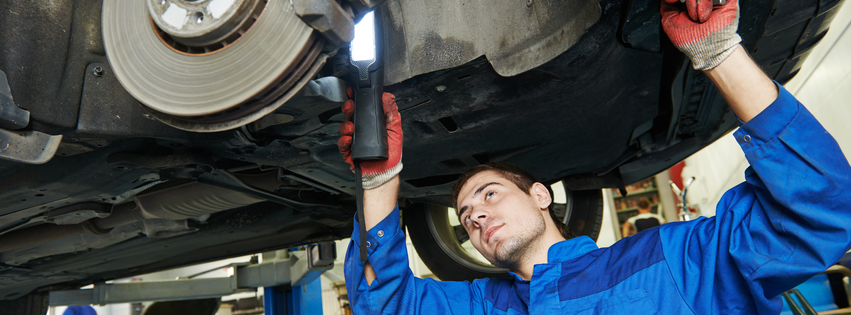
Brake pad inspections ensure safe and effective stopping. Hybrid vehicles use regenerative braking, which reduces wear on brake pads. However, pads still wear down over time. Thus, checking them every 10,000 miles helps prevent damage to rotors. Also, replacing pads before they wear too thin avoids more expensive repairs.
Air Filter Replacement – Every 15,000 Miles
Replacing the air filter boosts engine performance and fuel efficiency. A clogged filter restricts airflow, making the engine work harder. Most manufacturers recommend changing the air filter every 15,000 miles, depending on driving conditions.
Tire Rotation – Every 5,000 Miles
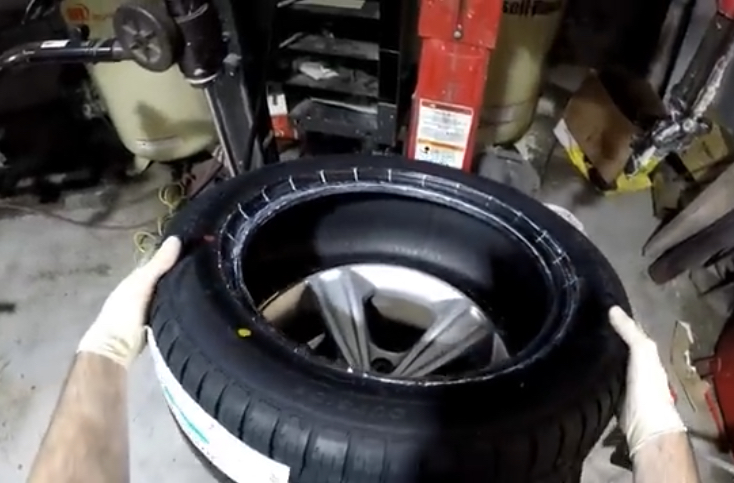
Proper tire inflation improves handling, fuel economy, and safety. Underinflated tires create more resistance, which lowers gas mileage and causes uneven wear. Therefore, checking tire pressure monthly and rotating tires every 5,000 miles extends their lifespan.
By following these maintenance steps, hybrid owners can maximize performance, extend vehicle life, and avoid expensive repairs. Regular inspections and timely service keep hybrid systems running efficiently for years to come.
Electric Vehicle Maintenance
Electric vehicles (EVs) have fewer moving parts than gas-powered cars, but they still need regular maintenance. Thus, taking care of key systems keeps them running smoothly and safely.
Tire Rotation – Every 5,000
Tires wear unevenly over time, especially in EVs, which have instant torque. Regular tire rotation evens out this wear, extending the lifespan of all four tires. Also, it improves traction and handling, ensuring a safer ride.
Brake System Inspection – Every 10,000 Miles
EVs use regenerative braking, which slows the vehicle by converting kinetic energy into electricity. As a result, this reduces wear on brake pads and rotors. However, the hydraulic braking system still plays a crucial role in sudden stops or low-speed braking. Therefore, inspecting the brake pads, rotors, and calipers prevents unexpected failures and keeps the system in top shape.
Brake Fluid Exchange – Every 2 Years
Brake fluid absorbs moisture over time, which lowers its effectiveness and can lead to corrosion in the braking system. Since EVs rely less on traditional braking, their fluid may go unchanged for too long. However, regular brake fluid exchanges prevent internal rust, maintain braking efficiency, and ensure quick stopping power when needed.
Cabin Air Filter Replacement – Every 15,000 Miles
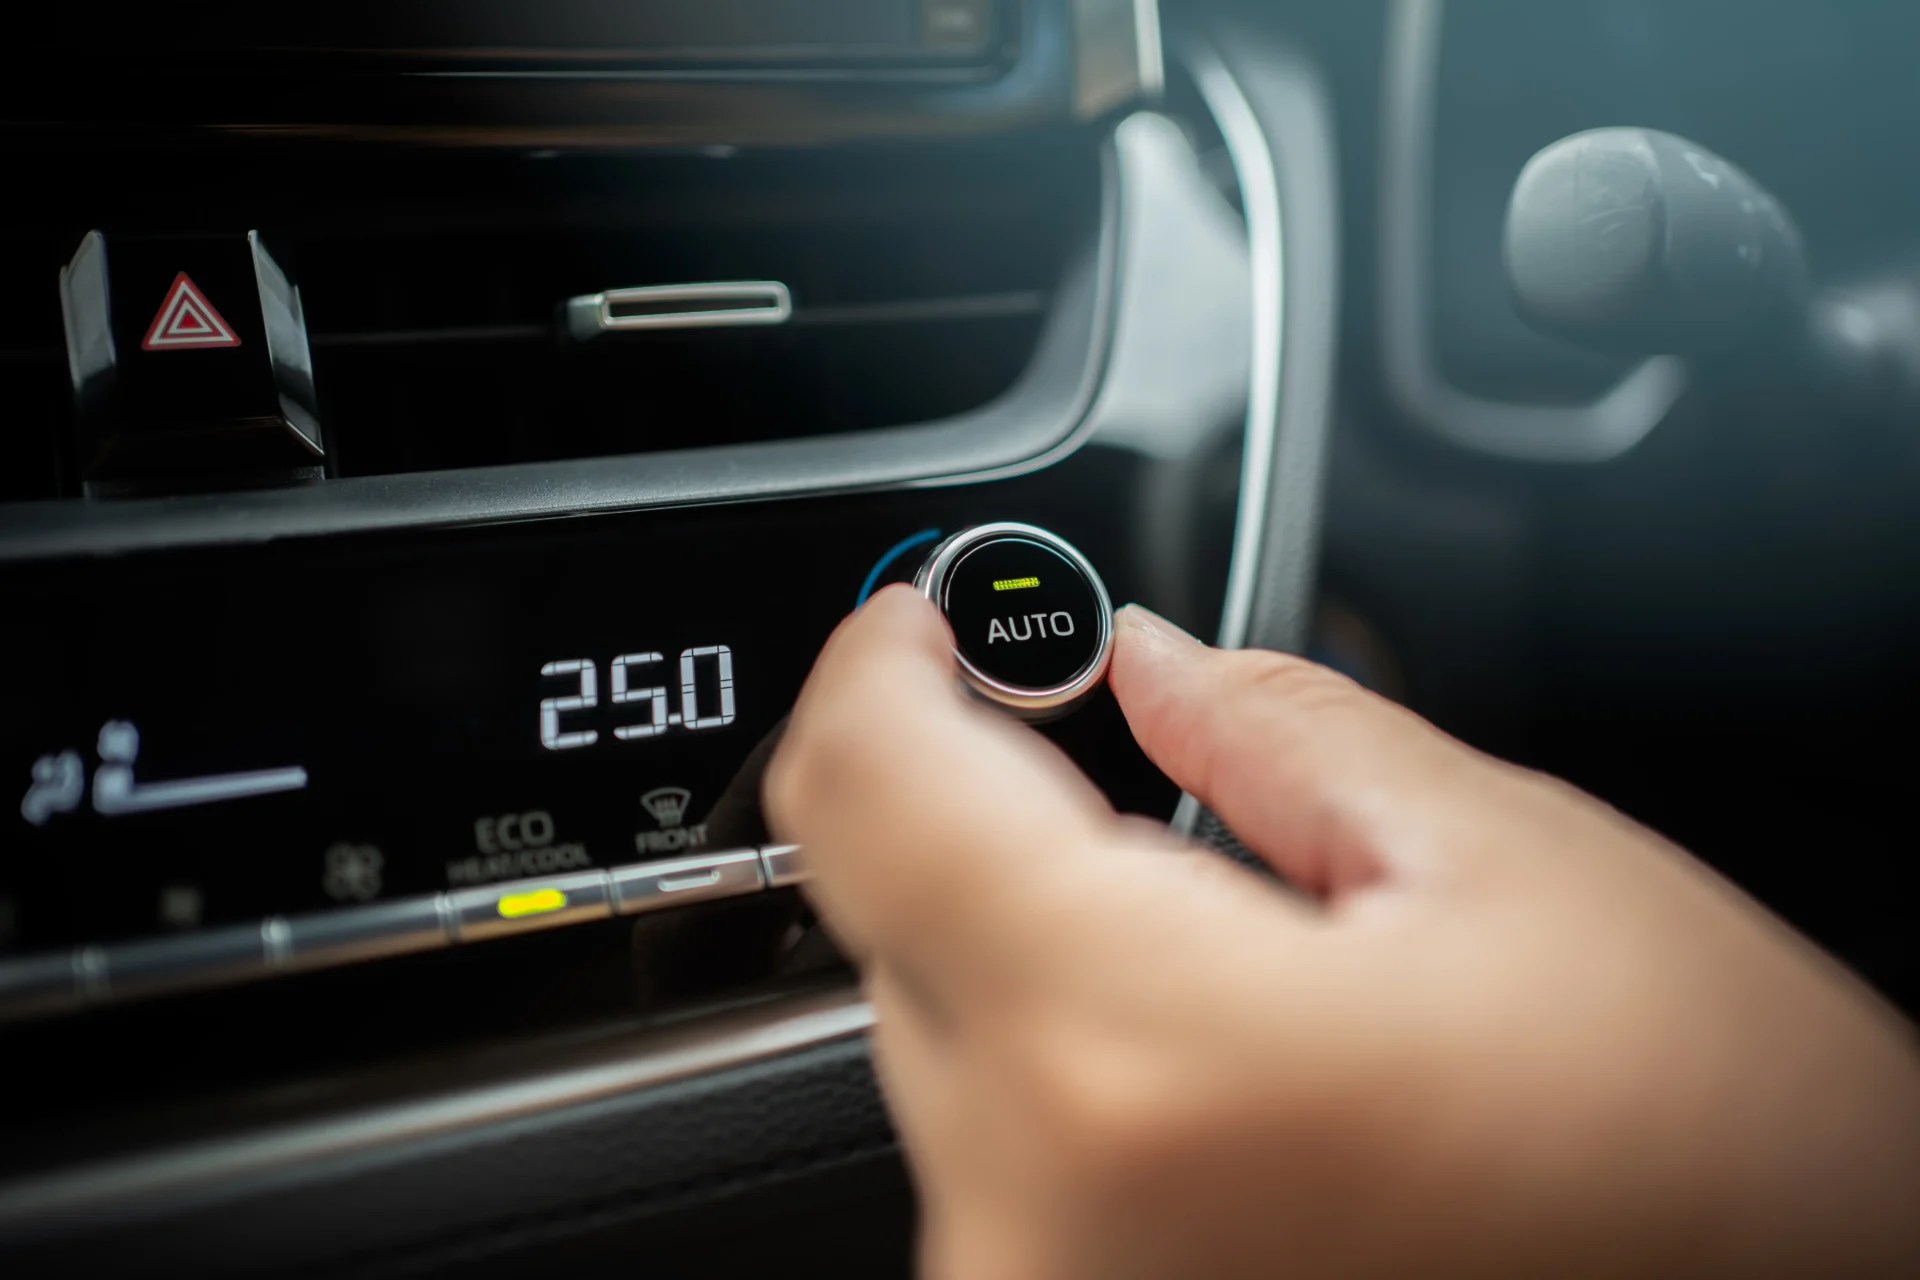
The cabin air filter traps dust, pollen, and pollutants, improving the quality of the indoor air. On the other hand, a clogged filter reduces airflow, forcing the HVAC system to work harder. Therefore, replacing it regularly keeps the air fresh and ensures efficient climate control.
Windshield Wiper Blade Replacement – Every 6 to 12 Months
Clear visibility is essential for safe driving, especially in bad weather. Wiper blades degrade over time due to exposure to sunlight, dirt, and moisture. Thus, swapping them out before they streak or chatter ensures a clean windshield and better visibility.
Battery Coolant Replacement – Every 30,000 or 5 years (Check Manufacturer Guidelines)
The high-voltage battery is the heart of an EV. It generates heat, and you must manage it to prevent overheating or reduced efficiency. Some EVs use a liquid cooling system with a special coolant to regulate battery temperature. However, this coolant degrades and loses effectiveness. Therefore, replacing it at recommended intervals ensures the battery stays within the ideal temperature range, prolonging its lifespan and maintaining optimal performance.
Software Updates – As Recommended by the Manufacturer
EVs rely heavily on software to control performance, safety, and efficiency. Moreover, manufacturers release updates to improve battery management, enhance regenerative braking, and add new features. Thus, staying up to date with software ensures the vehicle runs at peak efficiency and benefits from the latest security improvements.
Regular maintenance keeps an EV safe, efficient, and reliable. In other words, following the recommended service schedule extends the lifespan of key components and prevents costly repairs. For example, checking the owner’s manual for model-specific guidelines ensures the best care for every EV.
Battery Health and Electrical System Diagnostics
Hybrids and electric vehicles (EVs) depend on high-voltage batteries for power. Above all, proper maintenance helps extend battery life and preserves the value of your EV. For example, regular diagnostic tests identify issues before they become serious problems. Our Technicians use advanced tools to check battery performance, voltage levels, and overall health.
Charging habits also affect battery longevity. Avoiding deep discharges and overcharging helps maintain efficiency. In short, following manufacturer-recommended charging levels prevents excessive wear. Keeping the battery at an optimal charge range improves performance and reduces long-term degradation.
Electrical systems require periodic inspections to ensure all components function properly. Worn wiring, loose connections, or software glitches can affect efficiency. Routine system checks help detect these problems early. Addressing small issues prevents costly repairs and keeps your hybrid or EV running smoothly.
Why Choose Temecula Auto Repair & Transmission?
Owning a hybrid or EV means needing expert care. These vehicles require specialized training for proper maintenance. At Temecula Auto Repair & Transmission, our ASE-certified technicians stay up to date with the latest technology. We have the skills to handle battery checks, brake service, and software updates. With years of experience, we ensure your hybrid or electric vehicle runs at its best.
Noticing a strong gasoline odor inside or around your car is certainly concerning. A fuel smell could indicate minor issues or serious safety hazards. Over time, worn seals can leak fuel, causing a strong gas odor, especially in the engine bay. Here are the most common reasons why your car may smell like gas.
Fuel Leaks
Fuel Lines:
Over time, fuel lines can deteriorate due to corrosion, heat exposure, or physical damage. For example, cracks, pinholes, or loose fittings can allow fuel to escape, often leaving behind a strong gasoline odor. Rubber fuel hoses can also dry out and develop leaks.
Fuel Tank:
The fuel tank is susceptible to rust, impact damage, or even manufacturing defects that can cause leaks. Road debris, harsh weather conditions, and prolonged exposure to moisture can accelerate corrosion, leading to fuel seepage.
Fuel Injectors:
Fuel injectors rely on seals and O-rings to prevent leaks. However, worn seals can leak fuel over time, causing a strong gas odor. Also, faulty or clogged injectors may leak fuel.
Fuel Rail:
In fuel-injected engines, the fuel rail distributes fuel to the injectors. But, cracks, failed seals, or loose connections can leak fuel, causing a strong gas smell, especially when running.
Loose or Faulty Gas Cap
A loose, missing, or damaged gas cap can allow fuel vapors to escape, creating a noticeable gasoline smell. Consequently, a faulty fuel cap can cause gas odors and trigger the check engine light in sealed fuel systems.
Overfilled Gas Tank
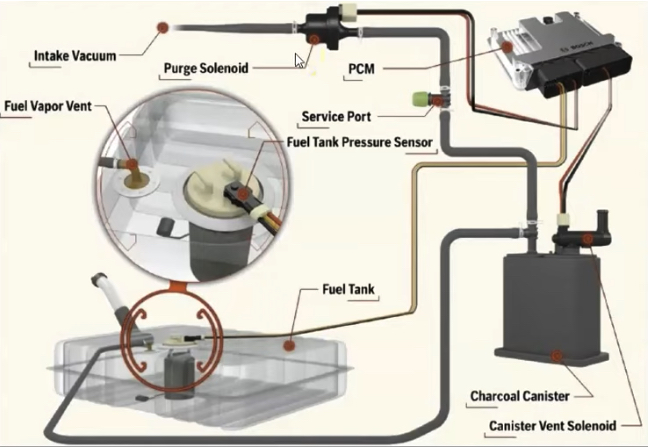
Overfilling your gas tank can cause excess fuel to overflow into the charcoal canister or EVAP system. The EVAP system captures and stores fuel vapors, preventing their release into the atmosphere. However, liquid fuel can saturate the charcoal canister, weakening its function and causing strong fuel odors near your vehicle.
Overfilling can also lead to other issues, such as:
Damage to the EVAP System:
Excess fuel can clog the charcoal canister, triggering the check engine light and costly repairs.
Fuel Expansion Problems:
Gasoline expands with temperature changes. Overfilling eliminates the necessary air space in the tank, increasing the risk of fuel leakage due to pressure buildup.
Wasted Fuel and Environmental Impact:
Overflowing fuel can drip onto the ground, evaporate into the air, and contribute to air pollution. Also, it wastes money by spilling fuel instead of keeping it in the tank.
To prevent these issues, it’s best to stop refueling once the nozzle clicks off. Additionally, modern fuel pumps detect a full tank. Therefore, adding more fuel can cause damage instead of helping.
Faulty EVAP System
The evaporative emissions control (EVAP) system captures and stores fuel vapors from the fuel tank. Most importantly, it prevents these vapors from escaping into the atmosphere and causing air pollution. It directs vapors into a charcoal canister. The canister stores them before they go to the engine for burning. Thus, when the EVAP system functions properly, it helps improve fuel efficiency and reduce harmful emissions.
However, when EVAP components fail, fuel vapors escape, causing a noticeable gasoline smell. Common EVAP system issues include:
Damaged or Cracked Charcoal Canister:
The charcoal canister is responsible for absorbing and storing fuel vapors. However, over time, it can become saturated, cracked, or damaged due to age, contamination, or overfilling of the fuel tank. So, if the canister fails, it may release excessive vapors, resulting in a persistent fuel odor. Also, a damaged canister can trigger the check engine light.
Faulty Purge or Vent Valve:
The purge valve sends vapors to the engine for combustion, while the vent valve controls airflow. Thus, if either valve malfunctions, it can cause excessive vapor buildup or leaks. Consequently, this leads to noticeable fuel smells and rough engine performance.
Loose, Disconnected, or Cracked EVAP Hoses:
The EVAP system relies on a network of vacuum hoses to transport fuel vapors. However, these hoses can deteriorate due to heat, age, or exposure to fuel and chemicals, leading to leaks. Moreover, a loose or disconnected hose can release vapors, causing a strong gas smell and an EVAP trouble code.
Signs of EVAP System Problems
– Persistent fuel smell, especially around the vehicle or near the fuel filler area.
– The check engine light illuminated, often with codes related to the EVAP system (such as P0440, P0455, or P0456).
– Hissing sounds near the fuel tank or charcoal canister, indicating a vacuum leak.
– Difficulty refueling, such as slow fuel filling or the fuel pump nozzle shutting off frequently.
Why You Should Address EVAP Issues
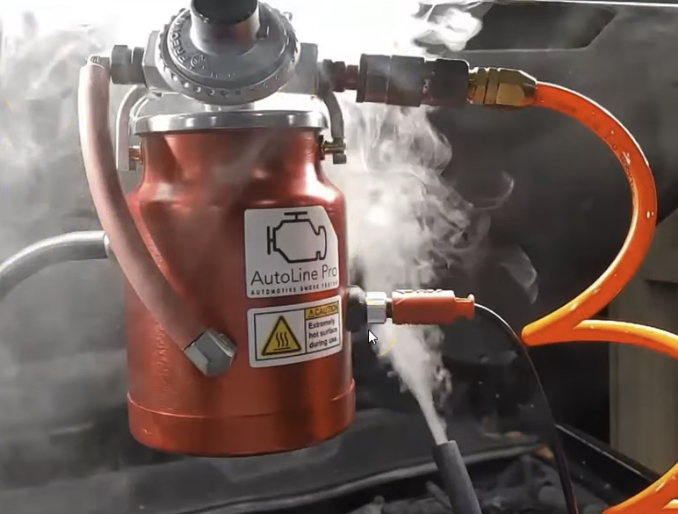
Ignoring EVAP issues reduces fuel efficiency, increases emissions, and can damage the fuel tank or engine. Suspect an EVAP issue? Our professional diagnostic test with a smoke machine or scan tool can help.
Exhaust Fumes or Unburned Fuel
A “rich” engine runs with too much fuel in the air-fuel mixture compared to the ideal ratio. This excess fuel may not fully combust, leading to a noticeable gasoline smell in the exhaust. Consequently, a rich condition reduces fuel efficiency and increases carbon buildup in the engine. Also, it raises emissions and can damage components like the catalytic converter.
Common Causes of a Rich Fuel Mixture
Faulty Oxygen Sensors:
Oxygen sensors monitor exhaust gases and provide feedback to the Engine Control Module (ECM) for fuel mixture adjustments. A faulty sensor may signal a lean mixture, causing the ECM to add excess fuel. Consequently, this results in a rich-running engine and excessive unburned fuel in the exhaust.
Bad Fuel Pressure Regulator:
The fuel pressure regulator controls the pressure of fuel delivered to the injectors. However, a malfunctioning sensor can allow too much fuel into the engine, whether stuck closed or leaking. Additionally, a faulty regulator causes a rich fuel mixture, leading to black smoke, poor acceleration, and fuel odor.
Leaky Fuel Injectors:
Fuel injectors are responsible for delivering the precise amount of fuel into the combustion chamber. But, a stuck open injector, worn seals, or fuel dripping when closed can send excess unburned fuel to the exhaust. As a result, this not only creates a fuel smell but can also lead to engine misfires and rough idling.
Symptoms of a Rich-Running Engine
– Strong gasoline smell from the exhaust, particularly at idle or during acceleration.
– Black smoke coming from the tailpipe due to incomplete fuel combustion.
– Reduced fuel economy and increased fuel consumption.
– Rough idling or hesitation during acceleration.
– Check engine light illuminated with possible trouble codes (such as P0172 or P0175, indicating a rich condition).
– Soot buildup on spark plugs due to excessive fuel exposure.
Why a Rich Mixture Is a Problem
A continuously rich-running engine causes carbon buildup inside the combustion chambers and fouls spark plugs. Consequently, excess fuel burning inside the exhaust can lead to premature catalytic converter failure. Also, it significantly increases emissions, contributing to environmental pollution and potentially causing the vehicle to fail emissions tests.
If you suspect your engine is running rich, it’s important to diagnose the issue quickly. Our technicians use tools like an OBD-II scanner, fuel pressure gauge, and exhaust gas analyzer. Moreover, these tools help identify the cause of the rich mixture and make repairs before further damage.
Malfunctioning Catalytic Converter
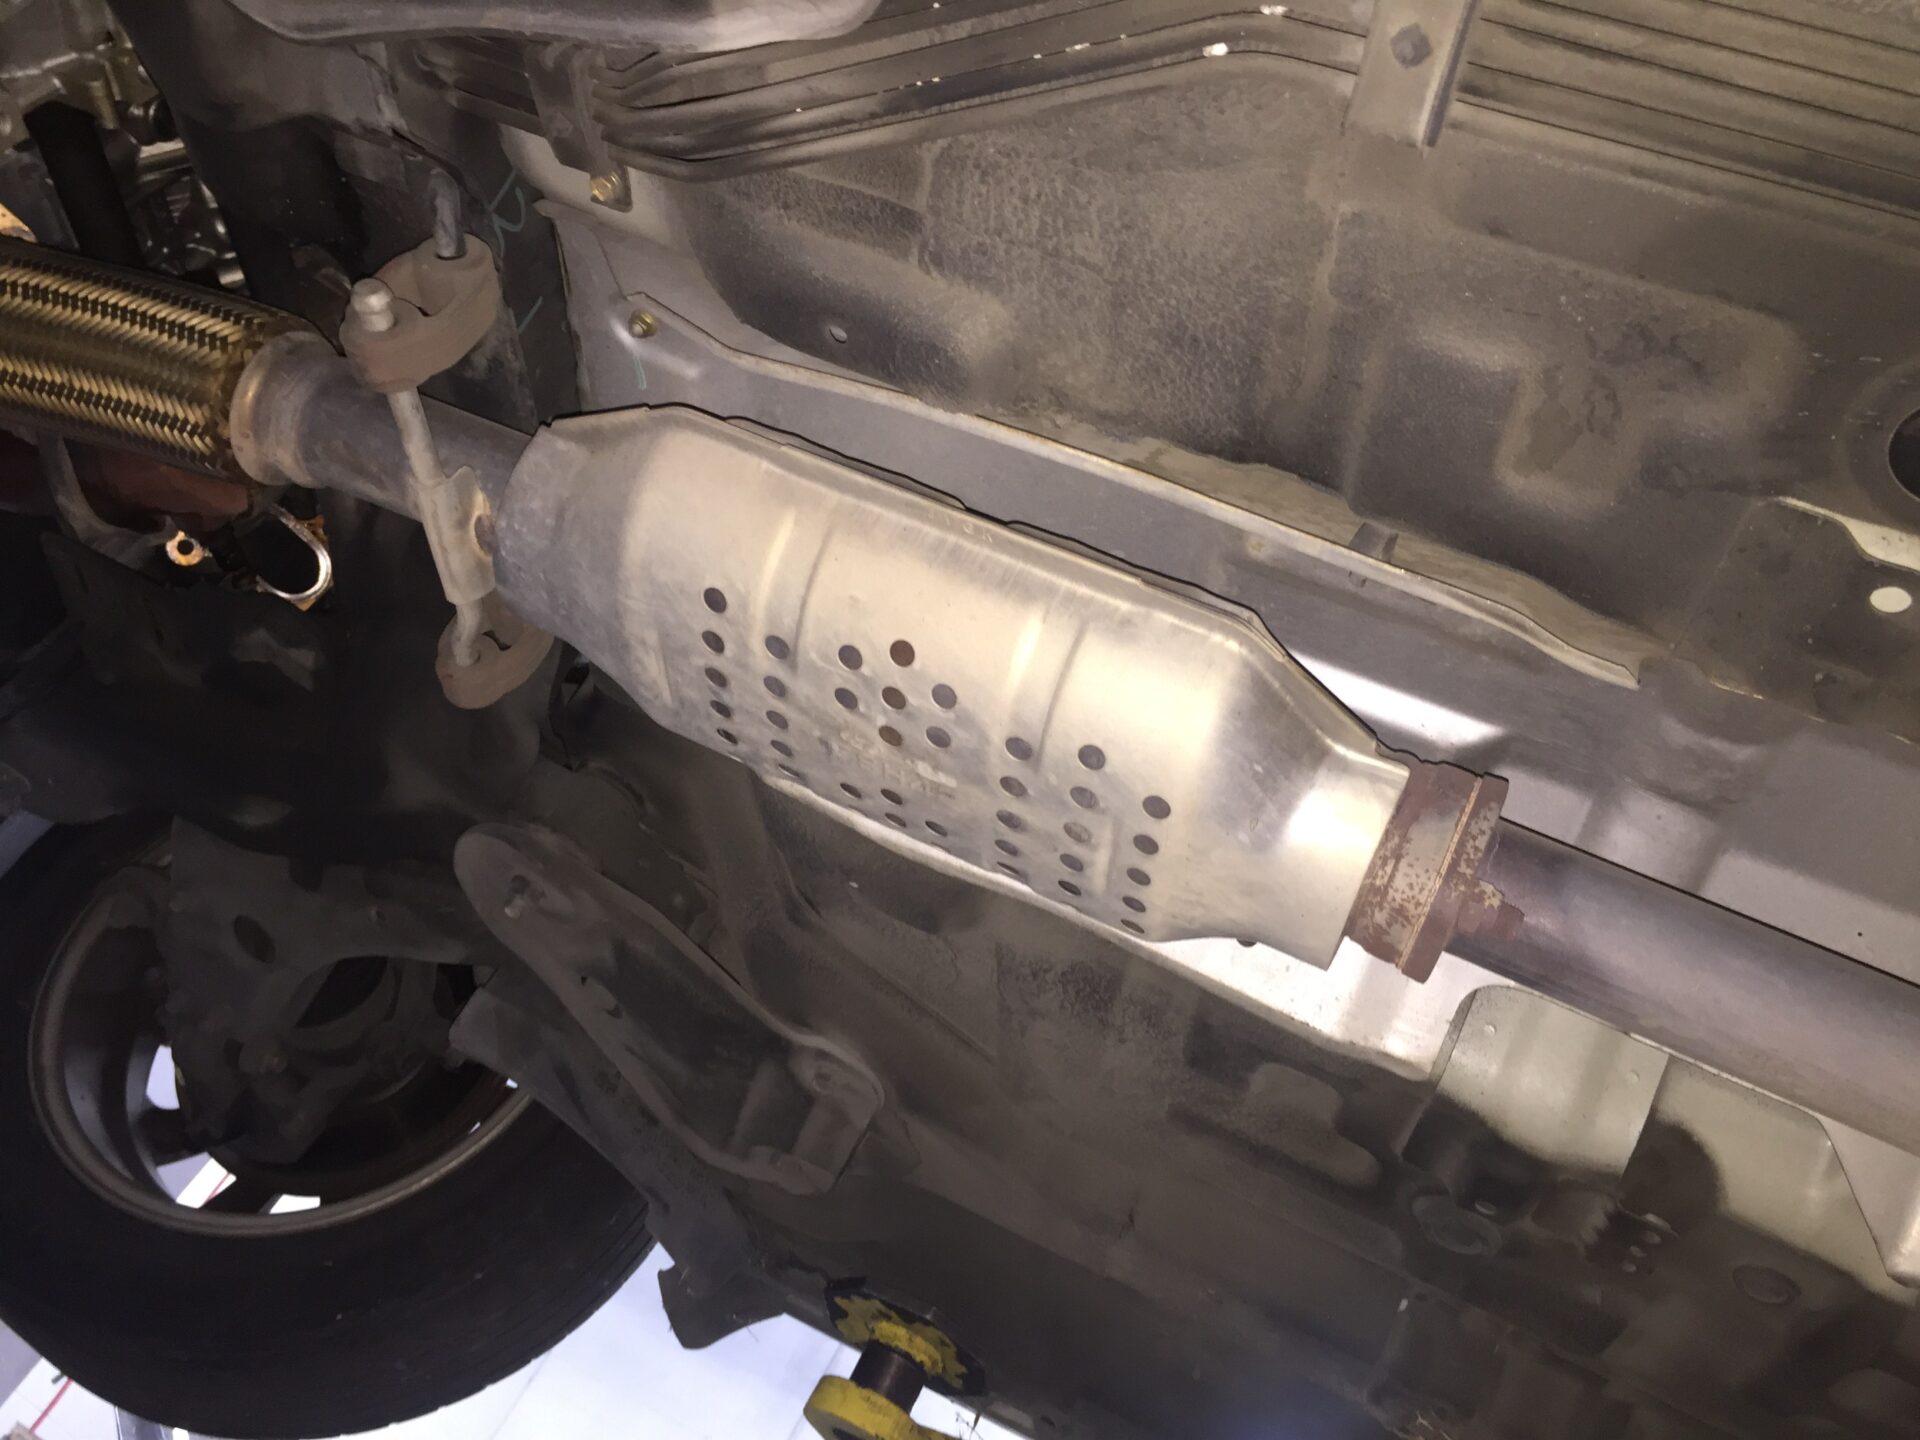
A failing catalytic converter impacts emissions by not breaking down pollutants like unburned fuel, carbon monoxide, and nitrogen oxides. Therefore, the catalytic converter converts these substances into less harmful gases before they exit through the exhaust system. However, a clogged or damaged converter may let gas fumes and unburned fuel pass, causing a gasoline smell.
Signs of a Failing Catalytic Converter
Persistent Fuel or Rotten Egg Smell –
If the converter can’t process unburned fuel, you’ll notice a strong fuel odor or sulfur-like smell from the exhaust.
Check Engine Light –
A failing catalytic converter often triggers the check engine light. As a result, it commonly produces codes like P0420 or P0430.
Decreased Fuel Efficiency –
A partially clogged catalytic converter creates exhaust flow restrictions, forcing the engine to work harder and consume more fuel.
Reduced Engine Performance –
A severely clogged converter restricts exhaust flow, causing sluggish acceleration, rough idling, and power loss.
Excessive Heat or Rattling Noise –
Fuel buildup inside the converter can overheat, damaging the honeycomb structure and causing a rattling sound from loose fragments.
Causes of Catalytic Converter Failure
Rich Fuel Mixture –
An engine running too rich (with excess fuel) can overwhelm the catalytic converter, causing it to overheat and deteriorate.
Oil or Coolant Contamination –
Internal engine leaks can allow oil or coolant to enter the exhaust, coating the catalytic converter and reducing its efficiency.
Long-Term Ignition Issues –
Misfires and incomplete combustion can send unburned fuel into the exhaust system, damaging the catalyst over time.
Why a Failing Catalytic Converter Is a Serious Issue
In brief, ignoring catalytic converter issues can lead to severe engine damage, excessive emissions, and potential failure of emissions tests. So, if you notice fuel odors, reduced power, or a check engine light, inspect your exhaust system to avoid costly repairs.
Old or Damaged Spark Plugs and Wires
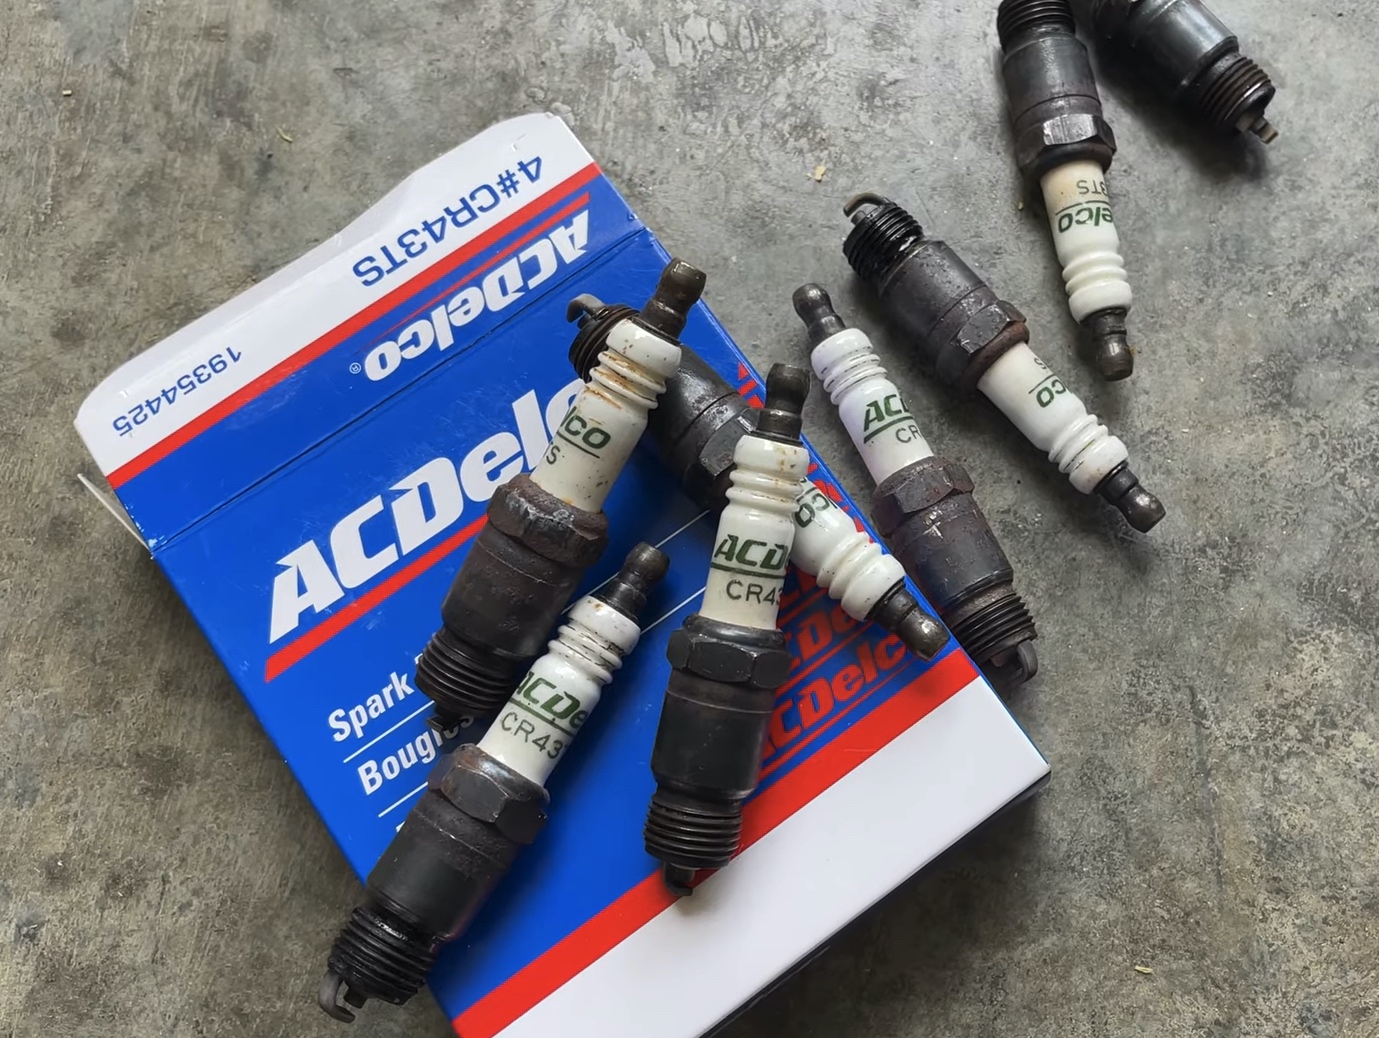
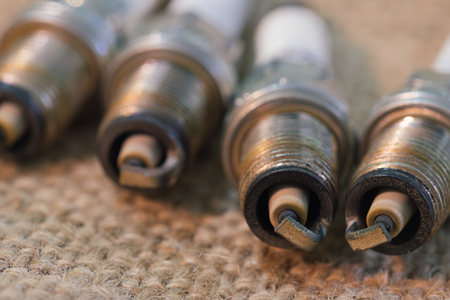
Worn or damaged spark plugs or ignition components can cause inefficient combustion, leading to incomplete fuel burn. Consequently, this can result in misfires, where the air-fuel mixture in one or more cylinders fails to ignite properly. As a result, unburned fuel can pass through the exhaust, causing a gasoline smell and potentially damaging the catalytic converter.
How Faulty Ignition Components Cause Fuel Odors
Worn or Fouled Spark Plugs:
Spark plugs ignite the air-fuel mixture in the combustion chamber. However, over time, spark plugs can become fouled with carbon, oil, or fuel residue, weakening their spark. As a result, this can lead to misfires, which allow unburned fuel to escape through the exhaust.
Failing Ignition Coils:
Ignition coils provide the necessary voltage to create a spark. But, a weak or failing coil can cause misfires or ignition failure in one or more cylinders. Consequently, this results in unburned fuel passing through the exhaust, sometimes accompanied by rough idling and poor acceleration.
Bad Spark Plug Wires or Ignition System Issues:
In distributor-based or coil-on-plug ignition systems, damaged spark plug wires can disrupt spark delivery. Additionally, faulty ignition control modules can lead to incomplete combustion.
Symptoms of Misfires and Ignition Issues
Persistent Fuel Smell –
Unburned gasoline escaping through the exhaust system can create a strong fuel odor, especially when idling or accelerating.
Rough Idling & Hesitation –
A misfiring engine may run unevenly, causing shaking, hesitation, or stalling.
Check Engine Light (CEL) Illuminated –
Misfires often trigger the check engine light with codes like P0300 (random misfire). In the meantime, codes like P0301-P0306 indicate specific cylinder misfires.
Reduced Fuel Efficiency –
If the engine isn’t burning fuel efficiently, it will consume more gasoline, leading to poor mileage.
Excessive Exhaust Smoke or Popping Sounds –
Unburned fuel in the exhaust system can lead to black smoke, strong odors, and even backfiring.
Why Addressing Ignition Issues Is Critical
If left unresolved, misfires and incomplete combustion can lead to:
Catalytic Converter Damage –
Excess unburned fuel can overheat and degrade the catalytic converter, leading to costly repairs.
Increased Emissions –
Poor combustion results in higher hydrocarbon emissions, which can cause emissions test failures.
Engine Performance Issues –
A misfiring engine will struggle with power loss, poor throttle response, and inefficient operation.
If you suspect ignition system issues, it’s best to inspect and replace worn spark plugs, coils, or wires as needed. Moreover, regular maintenance can prevent fuel odors, improve fuel efficiency, and keep your engine running smoothly.
Fuel Spillage
Gasoline spills on your car, hands, or clothing can cause a lingering odor due to gasoline’s volatility. Gasoline evaporates quickly but fumes can linger in fabrics, carpets, or porous surfaces, requiring proper cleaning.
How to Remove Gasoline Odors Effectively
Interior Spills (Seats, Carpets, and Floor Mats)
Blot the Spill Immediately –
Blot up soaked gasoline from fabric or carpeting with paper towels or an absorbent cloth before it seeps deeper.
Use a Specialized Cleaner –
Household cleaners like baking soda, white vinegar, or dish soap mixed with warm water can help break down gasoline residues. Additionally, commercial enzymatic degreasers or upholstery cleaners designed for fuel spills are even more effective.
Sprinkle Baking Soda or Cat Litter –
These absorbent materials help neutralize odors and draw out any remaining moisture. Allow it to settle in for a few hours before vacuuming.
Ventilate the Car –
Keep windows and doors open to allow fresh air circulation, which helps gasoline vapors dissipate faster.
Spilled Gasoline on Hands
Wash with Dish Soap and Baking Soda –
Dish soap cuts through grease, while baking soda neutralizes odors. Scrub thoroughly with warm water.
Use White Vinegar or Lemon Juice –
Soaking your hands in a mixture of vinegar and water (or rubbing with lemon juice) helps break down gasoline residues.
Apply Coffee Grounds or Stainless-Steel Soap –
Rubbing damp coffee grounds or a stainless steel bar on your hands can help neutralize fuel smells.
Gasoline on Clothing
Pre-Treat the Stain –
Soak clothing in a mixture of hot water, baking soda, and dish soap for at least 30 minutes before washing.
Use Heavy-Duty Laundry Detergent –
Wash separately from other clothes with an enzymatic detergent designed to break down oil and grease.
Air Dry –
Never put gasoline-stained clothes in the dryer, as heat can ignite residual fuel vapors. Instead, air-dry them outdoors.
Why It’s Important to Clean Up Gasoline Spills Quickly
Fire Hazard –
Gasoline is highly flammable, and even small vapors can pose a risk if exposed to sparks or flames.
Health Concerns –
Prolonged exposure to gasoline fumes can cause headaches, dizziness, and nausea, especially in confined spaces like a car interior.
Lingering Odors –
Improperly cleaned gasoline smells can persist for days or weeks, making your vehicle uncomfortable to use.
Cleaning spilled fuel promptly with proper methods and ventilation helps eliminate odors and reduce hazards.
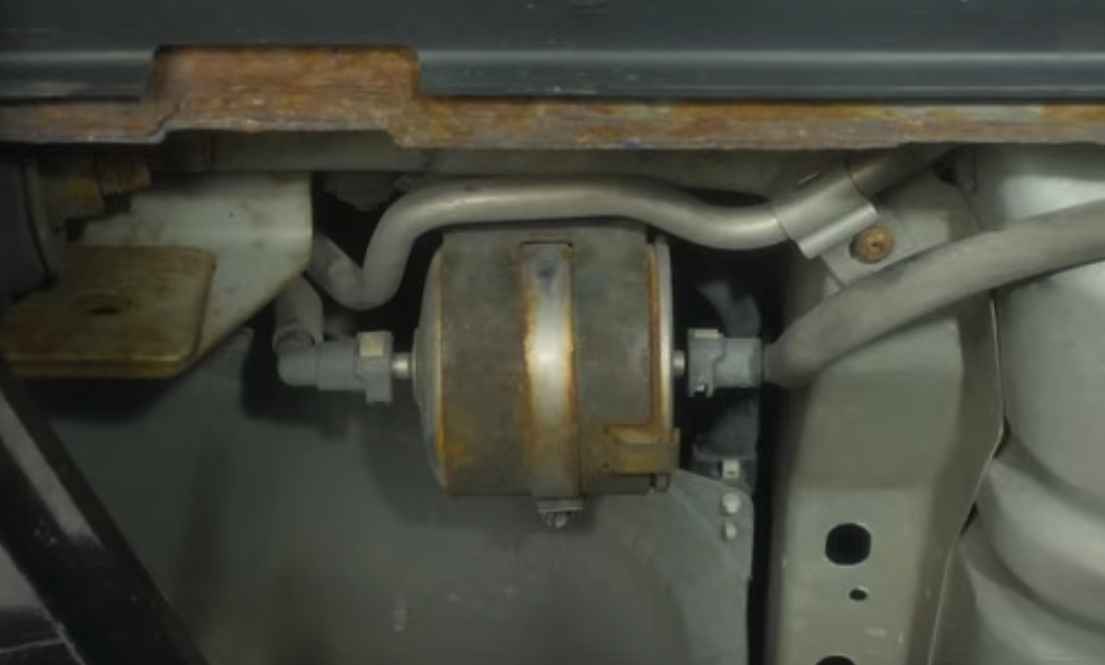
Clogged Fuel Filter
A clogged fuel filter can disrupt fuel flow, causing irregular fuel pressure. Consequently, this may lead to leaks, excessive fuel delivery, or incomplete combustion, resulting in a gasoline smell. The fuel filter traps dirt, debris, and contaminants before fuel reaches the engine. As a result, this ensures optimal performance and prevents damage to fuel system components. However, over time, the filter can become clogged, restricting fuel flow and leading to various fuel-related issues.
How a Clogged Fuel Filter Can Cause Fuel Odors
Fuel Pressure Buildup and Leaks –
A severely clogged fuel filter can increase fuel pressure upstream, causing excessive stress on the fuel lines, connections, or seals. Consequently, this can cause small fuel leaks around fittings, injectors, or the pump, allowing gasoline fumes to escape.
Overworked Fuel Pump –
The fuel pump must work harder to push fuel through a restricted filter, leading to higher pressure in the system. In some cases, excessive strain on the fuel pump can cause it to leak fuel or fail prematurely.
Excessive Fuel Delivery –
A partially clogged fuel filter can cause irregular fuel pressure, leading to excess fuel reaching the injectors. Consequently, this can result in a rich fuel mixture, contributing to unburned fuel in the exhaust and an associated gasoline odor.
Engine Misfires and Rough Running –
A clogged filter may starve the engine of fuel, leading to misfires, poor acceleration, and rough idling. As a result, unburned fuel from misfiring cylinders can pass through the exhaust system, creating a strong fuel smell.
Signs of a Clogged or Failing Fuel Filter
Difficulty Starting the Engine –
Restricted fuel flow can make it harder for the engine to start, especially in cold conditions.
Engine Stalling or Hesitation –
A clogged filter can cause inconsistent fuel delivery, leading to stalling or hesitation, especially under load or acceleration.
Reduced Fuel Efficiency –
If the engine doesn’t receive efficient fuel delivery, it may consume more fuel, reducing mileage.
Check Engine Light –
A clogged fuel filter can trigger a lean mixture or fuel pressure codes, illuminating the check engine light.
Whining Noise from the Fuel Pump –
An overworked fuel pump struggling to push fuel through a clogged filter may produce a high-pitched whining or humming sound.
Why You Should Promptly Replace a Clogged Fuel Filter
Ignoring a clogged fuel filter can cause system damage, increased emissions, poor performance, and fuel leaks, creating a fire hazard. Manufacturers recommend replacing the fuel filter every 20,000 to 60,000 miles, depending on the vehicle and fuel quality. Therefore, if you notice symptoms, inspecting the fuel system and replacing the filter can prevent issues and eliminate odors.
Things to Do If Your Car Smells Like Gas
If you notice a persistent fuel smell, address it quickly to avoid leaks, malfunctions, or hazards. Here are some detailed steps to help identify and resolve the source of the smell:
Check the Gas Cap
– Secure the gas cap tightly, as a loose cap commonly causes fuel smells. Over time, the rubber gasket around the cap can wear out, leading to a poor seal. Screw the cap on tightly until it clicks into place.
– Inspect for cracks or damage. Examine the gas cap for visible cracks, splits, or worn-out seals. A damaged cap allows fuel vapors to escape, creating a smell. Replacing the gas cap with a new one is a quick and inexpensive fix.
– Check the O-ring. The O-ring inside the gas cap may degrade, which can lead to leaks. If the cap is fine but still smells like fuel, replace the O-ring or the entire cap.
Inspect for Leaks
– Look under the vehicle for wet spots or drips. Fuel leaks often appear as wet spots under the car, near the fuel tank, lines, or injectors.
Check for wetness or stains under the car, near the tank or fuel lines.
Pay attention to the fuel lines and connections. Most importantly, look for cracks, splits, or loose fittings that may be allowing fuel to leak.
– Examine the fuel tank: Inspect the tank for rust, dents, or any visible damage that could cause a leak. Corrosion can be a common culprit, especially in older vehicles.
– Check the fuel lines: Over time, fuel lines can become brittle, cracked, or disconnected, allowing fuel to seep out. Ensure they are securely attached and free from visible cracks.
Check for Engine Performance Issues
– Check for rough idling or poor acceleration. If your engine runs rough or stalls at idle, it may indicate an air-fuel mixture issue. Also, clogged filters, failing injectors, or other fuel system malfunctions could cause this. Excess fuel entering the system can produce a fuel smell as it is not burned efficiently.
– Check for difficulty starting. Struggling to start may indicate a malfunctioning fuel pump or fuel filter. Also, an inefficient fuel delivery system may also result in fuel vapors escaping, causing the odor.
– Watch for poor fuel economy. A vehicle consuming more fuel or showing decreased performance may have a fuel system issue. For example, this could involve a faulty fuel pressure regulator or clogged fuel filter.
– Check engine light: A check engine light with fuel system codes (e.g., P0172, P0455) may indicate issues. For instance, these could involve fuel injectors, pressure regulators, or evaporative emissions components, causing fuel odors.
Get a Professional Inspection
– If you can’t find the source after checking the gas cap and inspecting for leaks, it’s best to have our professional team inspect the vehicle. Engine performance issues could be a sign of a deeper problem.
We’ll use diagnostic tools to check fuel pressure, inspect injectors, and identify issues with the EVAP, sensors, or tank.
Also, we may use a smoke machine to detect hidden leaks in the fuel or EVAP system.
– Addressing the issue promptly: Unchecked fuel leaks or faulty systems can cause engine damage, fire hazards, or increased emissions. So, our trusted team will inspect and repair the problem. We’ll resolve the problem safely and effectively.
These steps help identify the gasoline smell source, preventing further damage and ensuring safer, more efficient driving.
Do not ignore a gasoline smell around your car, as it signals a serious safety risk, like a fuel leak. Addressing the issue promptly not only ensures your safety but also helps prevent costly repairs down the line. If you’re experiencing a gasoline odor in your vehicle, it’s crucial to have it checked out as soon as possible.
At Temecula Auto Repair & Transmission, we specialize in fuel system and leak repairs, providing expert diagnostics to identify the cause. We fix clogged fuel filters, damaged fuel lines, and faulty injectors. Our experienced team has the knowledge and tools to restore your vehicle safely.
We’ve proudly served the communities of Temecula, Murrieta, Winchester, and French Valley for over ten years. We provide reliable, top-quality automotive repair services to local drivers. If you need a professional inspection and repair, don’t hesitate to contact Temecula Auto Repair & Transmission today. We’re here to ensure your vehicle runs safely and efficiently!
Frequently Asked Questions
Is it safe to drive my car if it smells like gas?
Usually no. A gas smell often means a fuel leak, which is a fire risk. If it’s strong or you see fluid under the car, stop driving and have it inspected right away.
What are the most common causes of a gas smell?
A loose or worn gas cap, a leaking fuel injector or fuel line, an aging fuel pressure regulator, or an EVAP (charcoal canister) issue. A smoke test pinpoints it quickly.
Will a gas smell trigger my check engine light?
Often yes. EVAP leaks that cause a fuel odor frequently set the check engine light, so a diagnostic scan is a smart first step.
Why does my car smell like gas when idling?
An idle-only gas smell usually points to a small EVAP leak, a leaking fuel injector, or a vacuum or fuel-line seal that vents fuel vapor when airflow is low. A smoke test isolates it fast.
Can bad spark plugs cause a gas smell?
Yes. Worn or fouled spark plugs cause misfires that leave unburned fuel in the exhaust, producing a raw gas odor along with rough idle and a check engine light.
If you’ve ever felt your car shake when you apply the brakes, you’re not alone. This common issue can be unsettling. However, it’s often a sign of underlying problems that need attention. Thus, understanding the reasons behind this shaking can help you address the issue before it leads to more serious damage. Here are the most common reasons your car might be shaking when you’re braking.
1. Warped Brake Rotors
Warped brake rotors are one of the primary causes of shaking while braking. These metal discs attach to the wheel hubs. When you press the brake pedal, the brake pads clamp down on these rotors to slow or stop your vehicle. Over time, factors such as excessive heat, aggressive braking, and prolonged use can cause the brake rotors to warp.
Consequently, this warping leads to an uneven surface, preventing consistent contact between the brake pads and rotors. As a result, the braking force becomes inconsistent, creating noticeable vibrations. Consequently, you may feel the vibration in the steering wheel, brake pedal, or even throughout the vehicle. If left unaddressed, warped rotors can compromise braking performance and reduce stopping power. Regular inspections and timely rotor resurfacing or replacement can help maintain smooth and safe braking.
2. Worn or Uneven Brake Pads
Furthermore, brake pads naturally wear down over time due to friction against the brake rotors. However, if they wear unevenly, it can result in vibrations or shaking when you apply the brakes. For instance, issues like misalignment, sticking calipers, or poor-quality materials will cause uneven wear that results in shaking. You’ll typically feel this shaking in the steering wheel or brake pedal, and it can worsen over time if you don’t address it.
Additionally, low-quality or old brake pads can develop hard spots, which are areas of the pad that become excessively hardened due to heat buildup. As a result, these hard spots create an inconsistent contact surface against the rotor, leading to pulsations when braking. Contaminants such as oil, grease, or road debris can also embed into the brake pad material. As result, this reduces its ability to grip the rotor effectively. Consequently, this contamination can cause a spongy or unpredictable braking feel, making it harder to stop smoothly and safely.
Regular brake inspections and using high-quality brake pads can help prevent these issues, ensuring even wear and consistent braking performance.
3. Sticking Brake Calipers
Next, brake calipers play a crucial role in the braking system. Brake calipers house the pistons that press the brake pads against the rotors. When working properly, the calipers smoothly engage and release the brake pads as you apply and release pressure on the brake pedal.
However, if a caliper gets stuck, it keeps one or both brake pads constantly pressing against the rotor. This continuous friction generates excessive heat. Consequently, this heat can lead to brake fade (a reduction in braking effectiveness), warping of the rotors, and uneven brake pad wear. Over time, this can cause vibrations and shaking, particularly when braking at higher speeds or on downhill slopes.
In addition to shaking, a stuck caliper may produce other warning signs. For example, a burning smell caused by overheating brake components, a noticeable pulling to one side when braking, or reduced overall braking performance may occur. In severe cases, you might even see smoke coming from the affected wheel. Thus, ignoring a faulty caliper can lead to more extensive damage, including rotor damage and potential brake failure.
Regular brake system inspections and maintenance, can help prevent caliper-related issues and ensure smooth, reliable braking performance. For instance, lubricating slide pins and replacing worn seals can prevent more severe braking issues.
4. Suspension or Steering Issues
Sometimes, issues with the suspension or steering system, not the brakes themselves, cause braking-related shaking. These components play a critical role in maintaining stability and control, especially when braking. When they become worn or damaged, they can lead to vibrations that may be mistaken for brake problems.
For example, tie rods, which connect the steering system to the wheels, help maintain proper wheel alignment and steering responsiveness. A worn-out or loose tie rod causes excessive play in the steering. Consequently, this play leads to vibrations that may become more pronounced when braking.
Similarly, ball joints, which allow for smooth movement between the suspension and wheels, can wear out. Consequently, if they become loose or develop excessive play, they can cause an unstable or shaky feeling when braking.
Wheel bearings are another potential culprit. These bearings enable the wheels to rotate smoothly with minimal friction. When they wear out or become damaged, they can cause a humming or grinding noise along with noticeable vibrations. You can feel these vibrations in the steering wheel. For example, vibrations may seem more apparent when braking due to the added stress placed on the wheel assembly.
Since these suspension and steering issues can mimic brake-related shaking, it’s important to have a thorough inspection if you experience vibrations when stopping. That is to say, ignoring worn suspension components can lead to further damage, reduced vehicle control, and unsafe driving conditions.
5. Tire Problems
Additionally, unevenly worn tires, imbalanced wheels, or even loose lug nuts can all contribute to a shaky or unstable feeling when braking. While these issues may not be directly related to the braking system, they can significantly affect how the vehicle responds when you slow down.
Uneven tread wear can develop due to improper inflation, misaligned wheels, or worn suspension components. Therefore, if one or more tires have inconsistent wear patterns, such as cupping, feathering, or bald spots, it can cause vibrations that become more noticeable at certain speeds or when braking. Since braking shifts the vehicle’s weight forward, the contact between the tires and the road changes, amplifying any irregularities in the tread.
Wheel imbalance is another common cause of shaking, especially at higher speeds. An improperly balanced wheel creates a wobbling effect that may feel like brake-related vibrations. The shaking can intensify when braking as the force of deceleration accentuates any imbalance. Therefore, balancing the wheels ensures even weight distribution, which helps provide a smooth ride and more controlled braking.
Loose or improperly torqued lug nuts can also lead to a shaky sensation when braking. Loose lug nuts prevent the wheel from sitting flush against the hub, causing vibrations or an unstable feeling while driving. This can become especially dangerous, as it increases the risk of the wheel detaching from the vehicle. Checking and properly torquing the lug nuts can help prevent this issue.
To avoid these problems, it’s important to maintain proper tire pressure, rotate tires regularly, ensure proper wheel alignment, and have wheels balanced as needed. These simple maintenance steps can help ensure a smoother ride and more consistent braking performance.
6. Wheel Alignment Issues
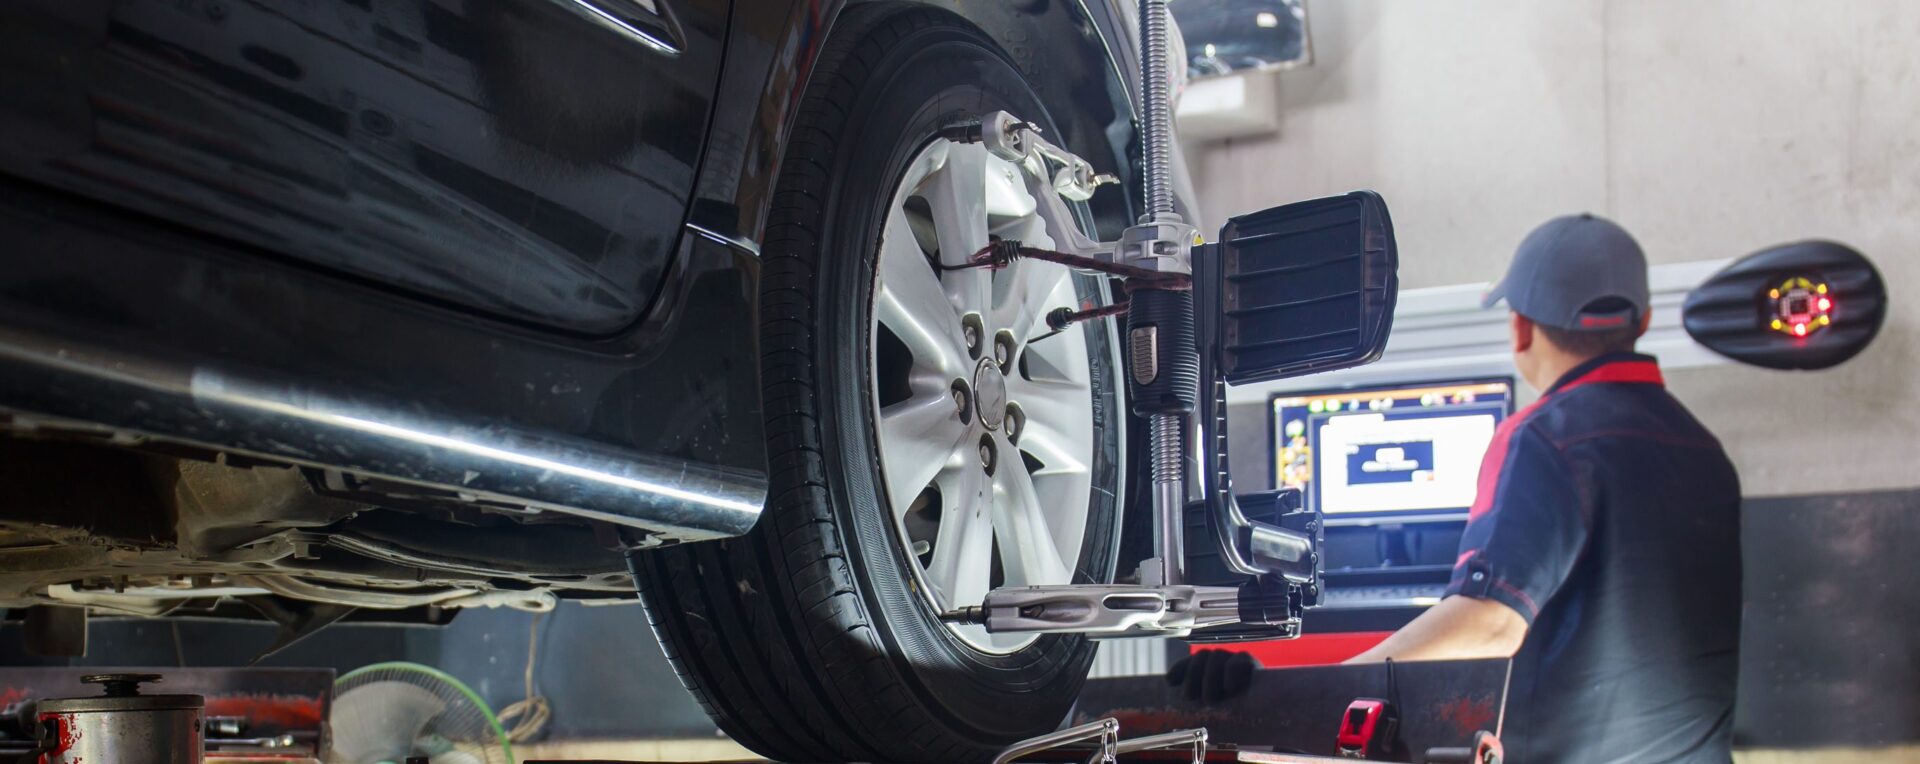
Next, misaligned wheels do not directly cause vibrations when braking, but they can contribute to issues that make braking feel rough or unsteady. When your wheels are out of alignment, they do not point straight ahead as they should, which means your tires make inconsistent contact with the road. This can lead to uneven tire wear, reduced traction, and added stress on suspension and braking components.
Over time, this misalignment can cause uneven braking pressure. Since the tires are not rolling evenly, the brake pads and rotors may experience different levels of force when you apply the brakes. This imbalance can result in one side of the vehicle slowing down more than the other, leading to a pulling sensation when braking. In extreme cases, the added strain on the braking system can also contribute to brake components wearing out faster, increasing the risk of warped rotors or uneven brake pad wear—both of which can create vibrations when stopping.
Additionally, misaligned wheels can cause subtle handling issues, making it harder to keep the car steady under braking. If the steering components are under stress due to prolonged misalignment, they may develop excessive play or wear, which can amplify vibrations felt in the steering wheel when decelerating.
If you notice your car pulling to one side or experiencing abnormal wear on the tires, it’s a good idea to come to us and have the wheel alignment checked and corrected. Proper alignment not only extends tire life but also ensures even braking and a smoother driving experience.
7. Faulty Wheel Bearings
Lastly, wheel bearings play a crucial role in allowing your wheels to spin smoothly with minimal friction. They handle the vehicle’s weight and support the forces generated by acceleration, braking, and cornering. However, when wheel bearings become worn, corroded, or damaged, they can disrupt this smooth rotation, leading to noticeable symptoms such as grinding, humming, or vibrating sensations—especially when braking.
A bad wheel bearing may first produce a low humming or growling noise that gets louder as your speed increases. You might mistake this noise for tire noise, but it typically becomes more pronounced when turning. If the bearing wear progresses, it can cause excessive wheel play, leading to vibrations in the steering wheel or brake pedal when slowing down. In severe cases, a completely failed bearing can cause the wheel to wobble or even detach, making it a serious safety hazard.
How to Fix the Issues
If your car shakes when braking, it’s important to identify and resolve the problem quickly to prevent further damage or unsafe driving conditions. Here are some key steps to take:
Inspect the brake rotors and pads – Warped rotors or uneven brake pad wear commonly cause braking vibrations. If rotors show signs of warping or excessive wear, they may need resurfacing or replacement. Similarly, we’ll check brake pads for uneven wear patterns, contamination, or glazing.
Check the brake calipers – Sticking or seized calipers can cause excessive heat buildup and uneven braking pressure, leading to vibrations. Make sure calipers are properly engaging and releasing the brake pads.
Examine your tires and wheels – Unbalanced or misaligned wheels can create a shaky sensation that becomes more noticeable when braking. Check for uneven tread wear, proper tire pressure, and wheel balance. Also, ensure that all lug nuts are securely fastened.
Assess the suspension and steering components – Worn-out tie rods, ball joints, or control arms can contribute to instability and vibrations when braking. Replace any loose or excessively worn parts to restore proper vehicle handling.
If you experience consistent shaking when braking, it’s best to have a professional mechanic inspect the entire braking and suspension system to pinpoint the exact cause. Addressing the issue promptly can prevent further damage, improve safety, and ensure a smoother ride.
When to Come See Us
You can diagnose and fix minor brake-related issues, like checking tire pressure or ensuring lug nuts are tight, at home. However, if the shaking persists, come have our professionals inspect your vehicle. Even though the symptoms may seem like a minor inconvenience, ignoring brake vibrations can lead to more serious consequences over time, such as decreased braking efficiency, longer stopping distances, and increased safety risks. Brake system issues that go unaddressed can also cause additional damage to other components, like the rotors or suspension, leading to higher repair costs.
At Temecula Auto Repair & Transmission, we have been proudly serving the Temecula, Murrieta, Winchester, French Valley, and surrounding areas for over a decade. Our experts have the knowledge and tools to diagnose and repair braking issues efficiently, ensuring your vehicle stays safe and smooth on the road. Whether you’re dealing with shaking when braking or any other braking system concern, our technicians tailor professional service to your vehicle’s needs.
If you’re experiencing shaking while braking, don’t wait for the issue to worsen. Call us today for a comprehensive inspection and expert repair to restore your braking system to its optimal performance!
Frequently Asked Questions
Can warped or bad rotors cause my car to shake when braking?
Warped or unevenly worn rotors are the most common cause. As the pads grip an uneven surface you feel a pulsing in the pedal or steering wheel, usually worse at higher speeds.
Can loose lug nuts cause vibration when braking?
Yes. Loose or unevenly torqued lug nuts let the wheel shift under braking load, which shows up as a wobble. It is also a safety risk, so have the torque checked right away.
Can a bad wheel bearing cause shaking when I brake?
A worn wheel bearing can vibrate more under braking as load shifts onto it, often with a humming or growling noise that changes with speed.
Can bad or unbalanced tires make my car shake when braking?
Yes. Worn, cupped, or out-of-balance tires can shake most when slowing down. A tire inspection and balance often clears it before any brake parts are replaced.
Why does my car shake when braking at high speed but not low speed?
That usually points to warped rotors or a wheel-balance issue, since the imperfection cycles harder at higher speeds. A rotor and balance check pinpoints which.
Tips for Purchasing a Used Car: Avoiding Pitfalls and Making Smart Choices
Buying a used car can be a practical and economical choice, especially in California, where the cost of living can make purchasing a new vehicle a significant financial burden. However, it’s crucial to approach this process with care to avoid potential pitfalls that could lead to costly repairs down the road.
Here’s a guide to help you navigate the used car market, highlighting common traps and providing practical advice.
Sources for Used Cars
When shopping for a used car, you have several options, each with its own set of advantages and disadvantages.
Private Party Sales
Purchasing a car directly from an individual can often yield the best prices. However, this route comes with its risks. For example, private sellers may not disclose all the issues with the vehicle, and you won’t have any post-sale support if problems arise. Thus, it’s essential to ask for maintenance records and have the car inspected by a trusted mechanic before finalizing the deal.
Dealerships
Buying from a dealership generally offers more security. For instance, dealerships often provide certified pre-owned vehicles that have undergone thorough inspections and come with warranties. However, these added assurances usually come at a higher price. Therefore, you should compare prices and read reviews to ensure the dealership offers a fair deal.
Online Used Car Sales
The internet has expanded the market for used cars, with platforms like eBay Motors, Craigslist, OfferUp, and specialized online dealerships. While these platforms provide a broad selection, they also come with unique challenges. For instance, buying a car without seeing it in person increases the risk of undisclosed defects and problems.
Trustworthiness
Always purchase from reputable and vetted sellers or dealers to reduce the risk of scams.
Areas to Focus on When Looking at a Used Car
When buying a used car, it’s critical to perform a detailed inspection to avoid ending up with someone else’s headaches and problematic vehicle. Here’s a list of some items to check:
1. Exterior Inspection
Body Condition
– Paint Overspray:
Carefully inspect the edges of vehicle trim, door seals, and wheel wells for paint overspray, which can indicate previous bodywork or repainting after an accident.
– Panel Alignment:
Check that all doors, the trunk, and the hood open and close smoothly without resistance. Look for misaligned body panels or uneven gaps, as these can be signs of poor repairs after a collision.
– Dents and Scratches:
Examine the body for any dents, scratches, or other surface imperfections. These can affect the vehicle’s appearance and may point to past accidents or poor handling.
– Rust:
Pay special attention to areas prone to rust, such as the bottom of doors, fenders, and underbody. Rust can weaken a vehicle’s structure and result in expensive repairs.
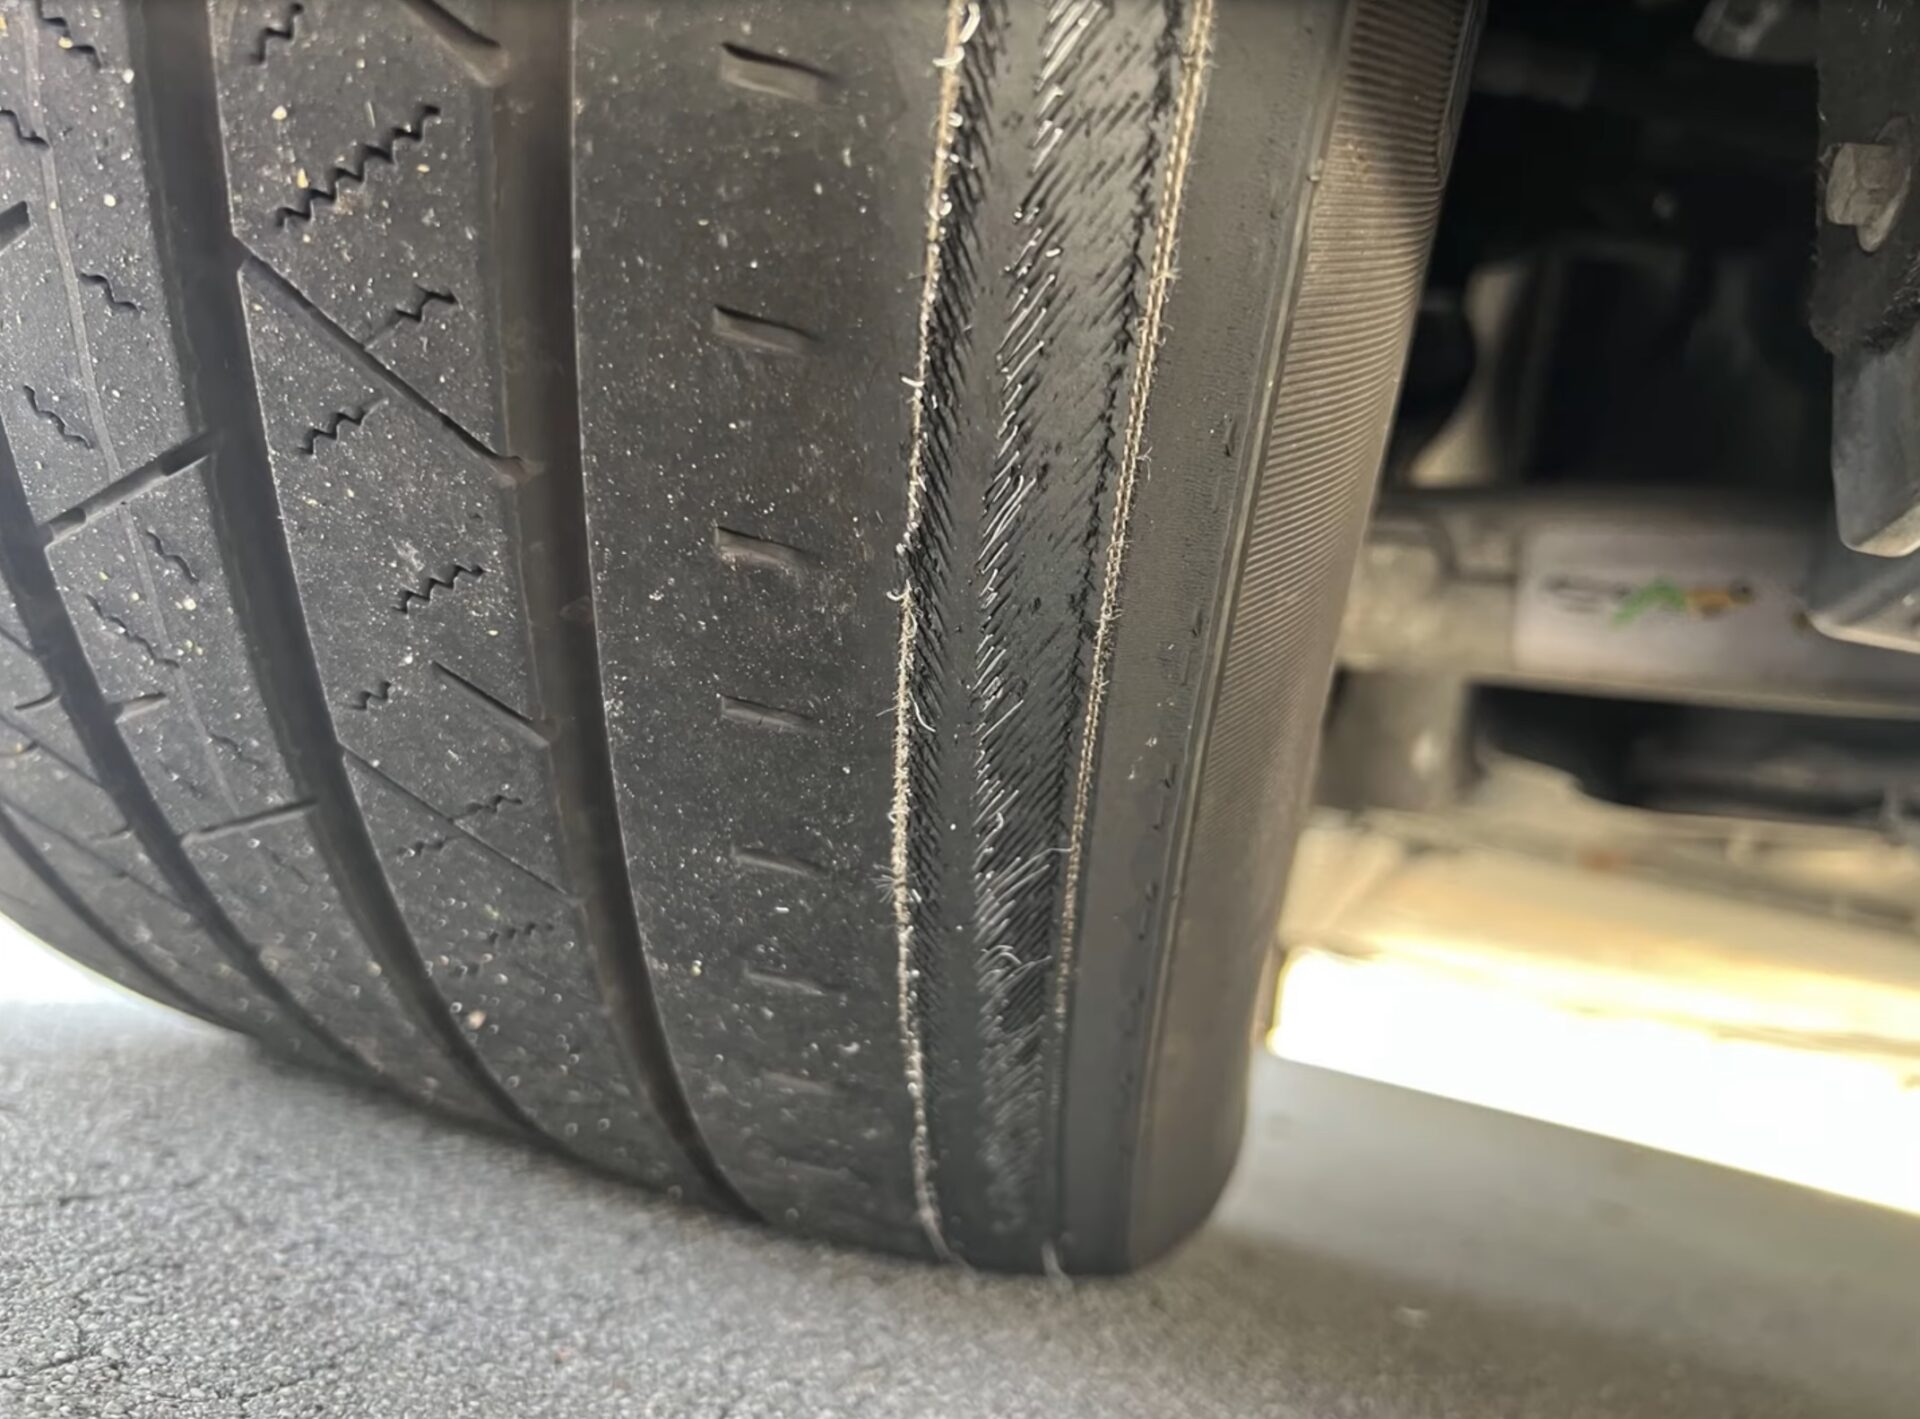
Tire Wear
– Uneven Wear:
Check the tread depth and look for uneven wear patterns on the tires. Uneven wear could signal alignment issues, suspension problems, or improper tire inflation.
– Mismatched Tires:
Ensure that all tires are of the same brand and type. Mismatched tires can affect the vehicle’s handling and increase wear on the drivetrain, leading to additional expenses.
Lights and Lenses
– Functionality:
Test all exterior lights, including headlights, brake lights, turn signals, and reverse lights, to ensure they are working properly.
– Condition of Lenses:
Check the lenses for cracks, fogging, or discoloration. Certainly, clear, intact lenses are crucial for optimal light output and safety.
Underbody
– Rust Inspection:
Check the underbody and undercarriage for rust, especially in regions where they salt the roads during winter. Rust in the underbody can lead to structural issues and compromise the vehicle’s safety. One particular concern with online purchases is the risk of buying a vehicle that has suffered harsh weather conditions in the Midwest or East Coast, leading to rust. So, always inquire about the car’s history and consider obtaining a vehicle history report to check for previous registrations in rust-prone areas.
In summary, this comprehensive approach ensures a detailed evaluation of the vehicle’s exterior, helping to identify potential issues that could affect the vehicle’s value, safety, and overall condition.
2. Interior Inspection
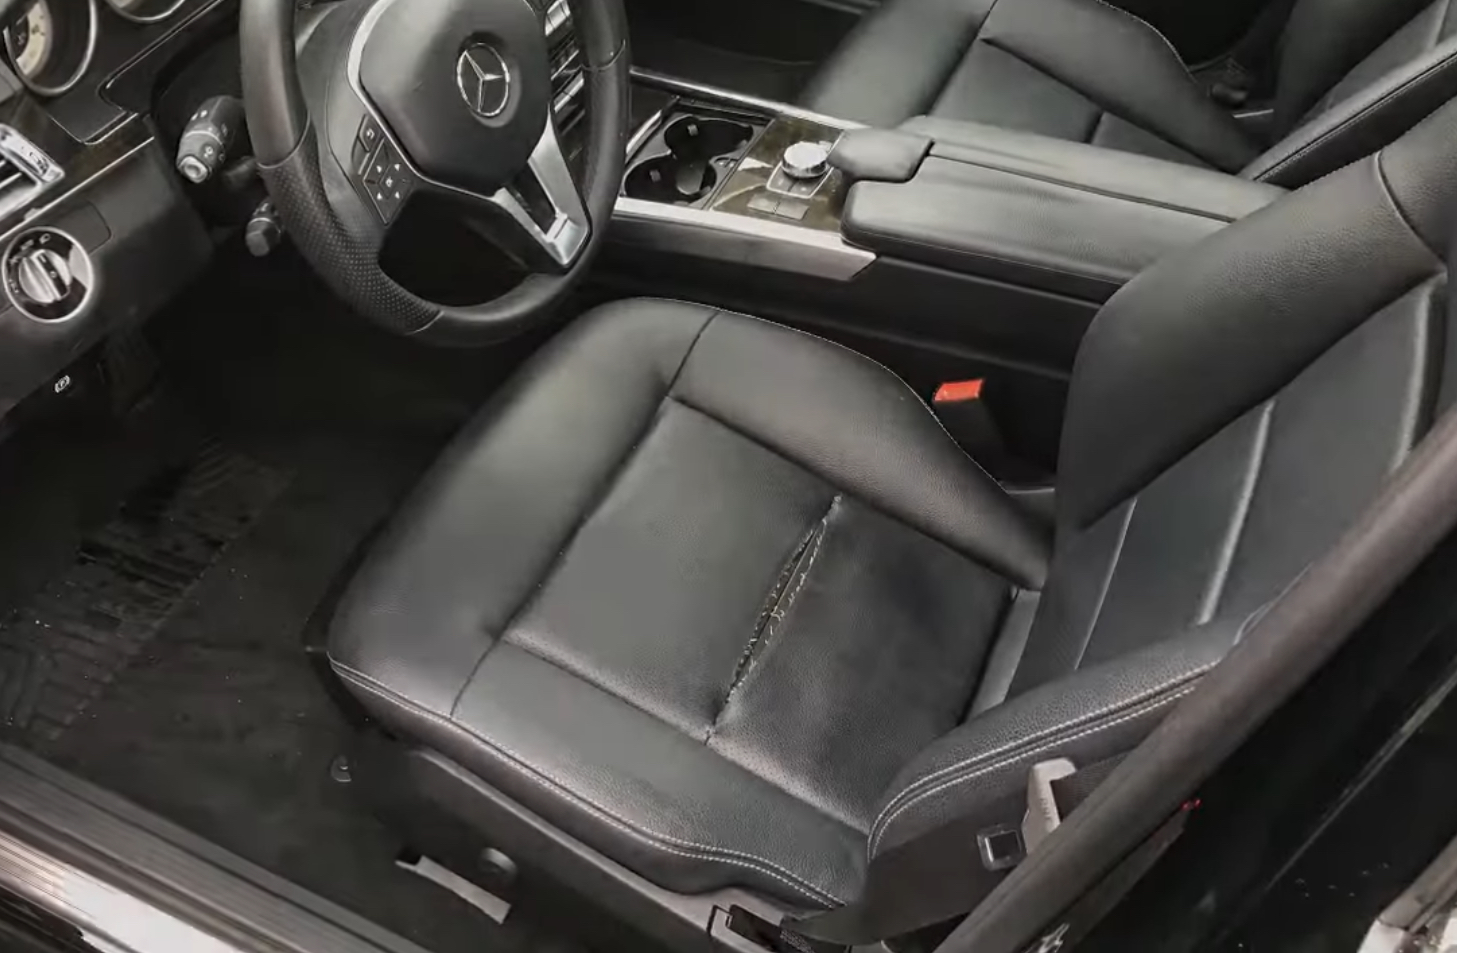
Upholstery
Perform a Surface Condition Check for tears, rips, or stains in the fabric or leather upholstery. Most importantly, pay attention to signs of wear and unusual odors like mildew, which may indicate water damage or previous leaks.
– Accessory Covers:
Lift any accessory seat covers to inspect the condition of the factory upholstery underneath. This step ensures that you discover hidden damage or wear during your inspection.
Seat Belts
– Condition:
Inspect seat belts for fraying, cuts, or other damage that could compromise their effectiveness.
– Operation:
Test the retractors and locking mechanisms to ensure they function correctly during sudden stops.
Air Bags
– Physical Inspection:
Check for cracks, bulges, or any physical abnormalities in the airbag covers.
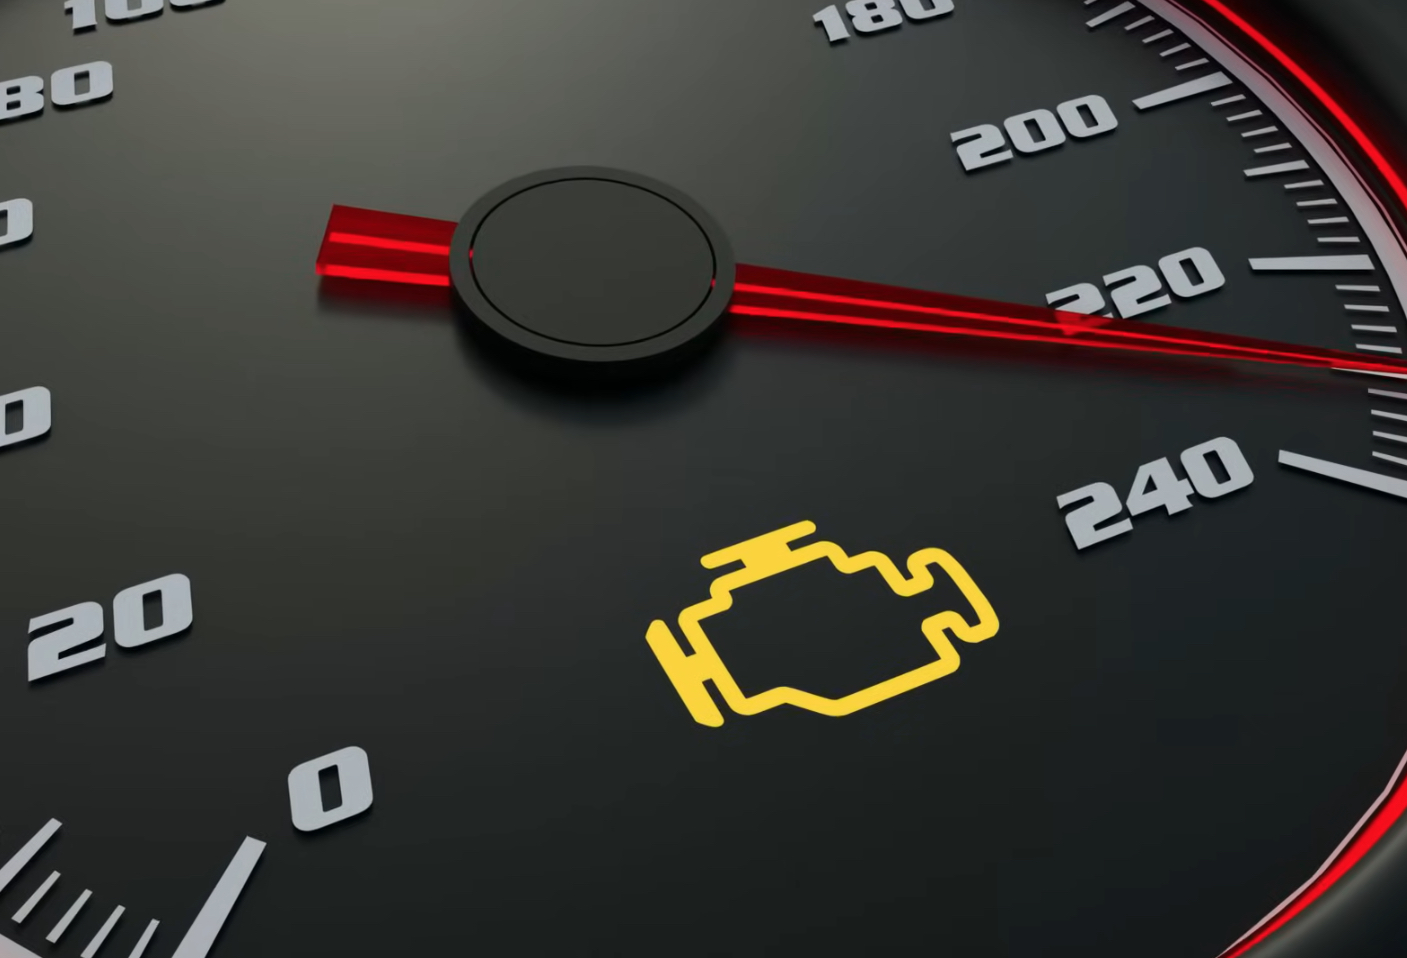
Warning Lights
– Dashboard Indicators:
Examine the dashboard for any warning lights, including the check engine light, ABS, airbag (SRS), and others. Above all, make sure the lights come on briefly during engine start-up and that they go off moments after the engine has been running. Failure in either way is an indication of a problem. Also, inspect for any modifications to the warning lights, such as black tape or black paint over any dash lights. Yes, we’ve actually seen that before.
Electronics
– Comprehensive Testing:
Turn on and off all electronic components to ensure they are operational. This includes checking the power locks, windows, mirrors, AC & heating systems, infotainment systems, and other electronic controls.
Odometer
– Mileage Verification:
Verify that the odometer reading aligns with the car’s age and service records. Discrepancies might indicate potential odometer tampering or inaccuracies in the vehicle’s history.
3. Under the Hood
Fluids
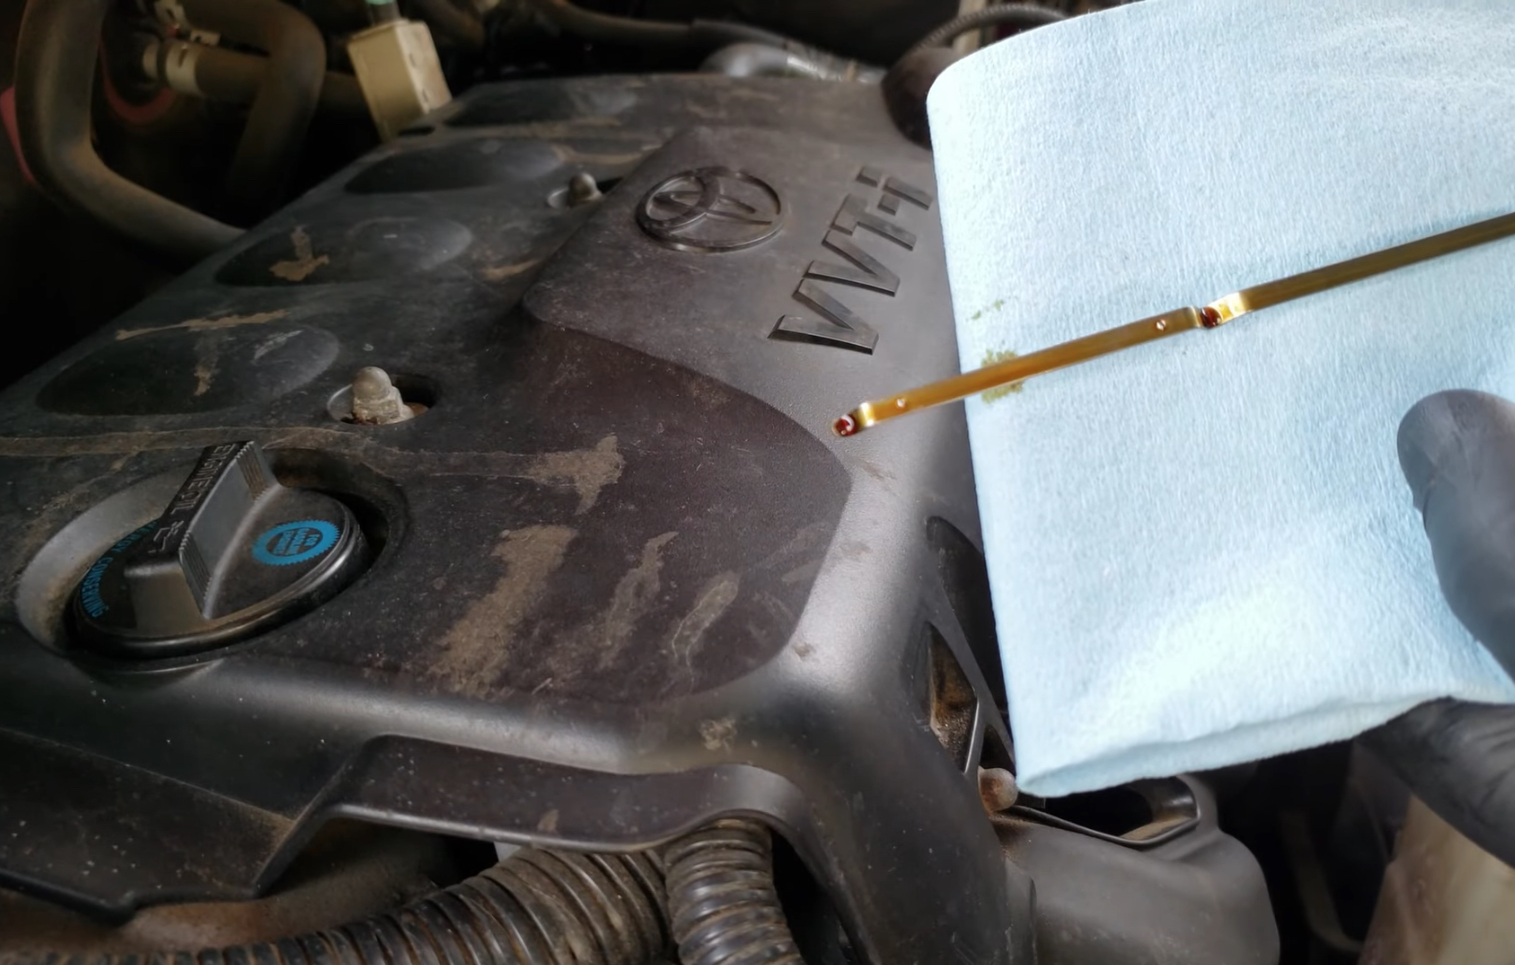
– Oil:
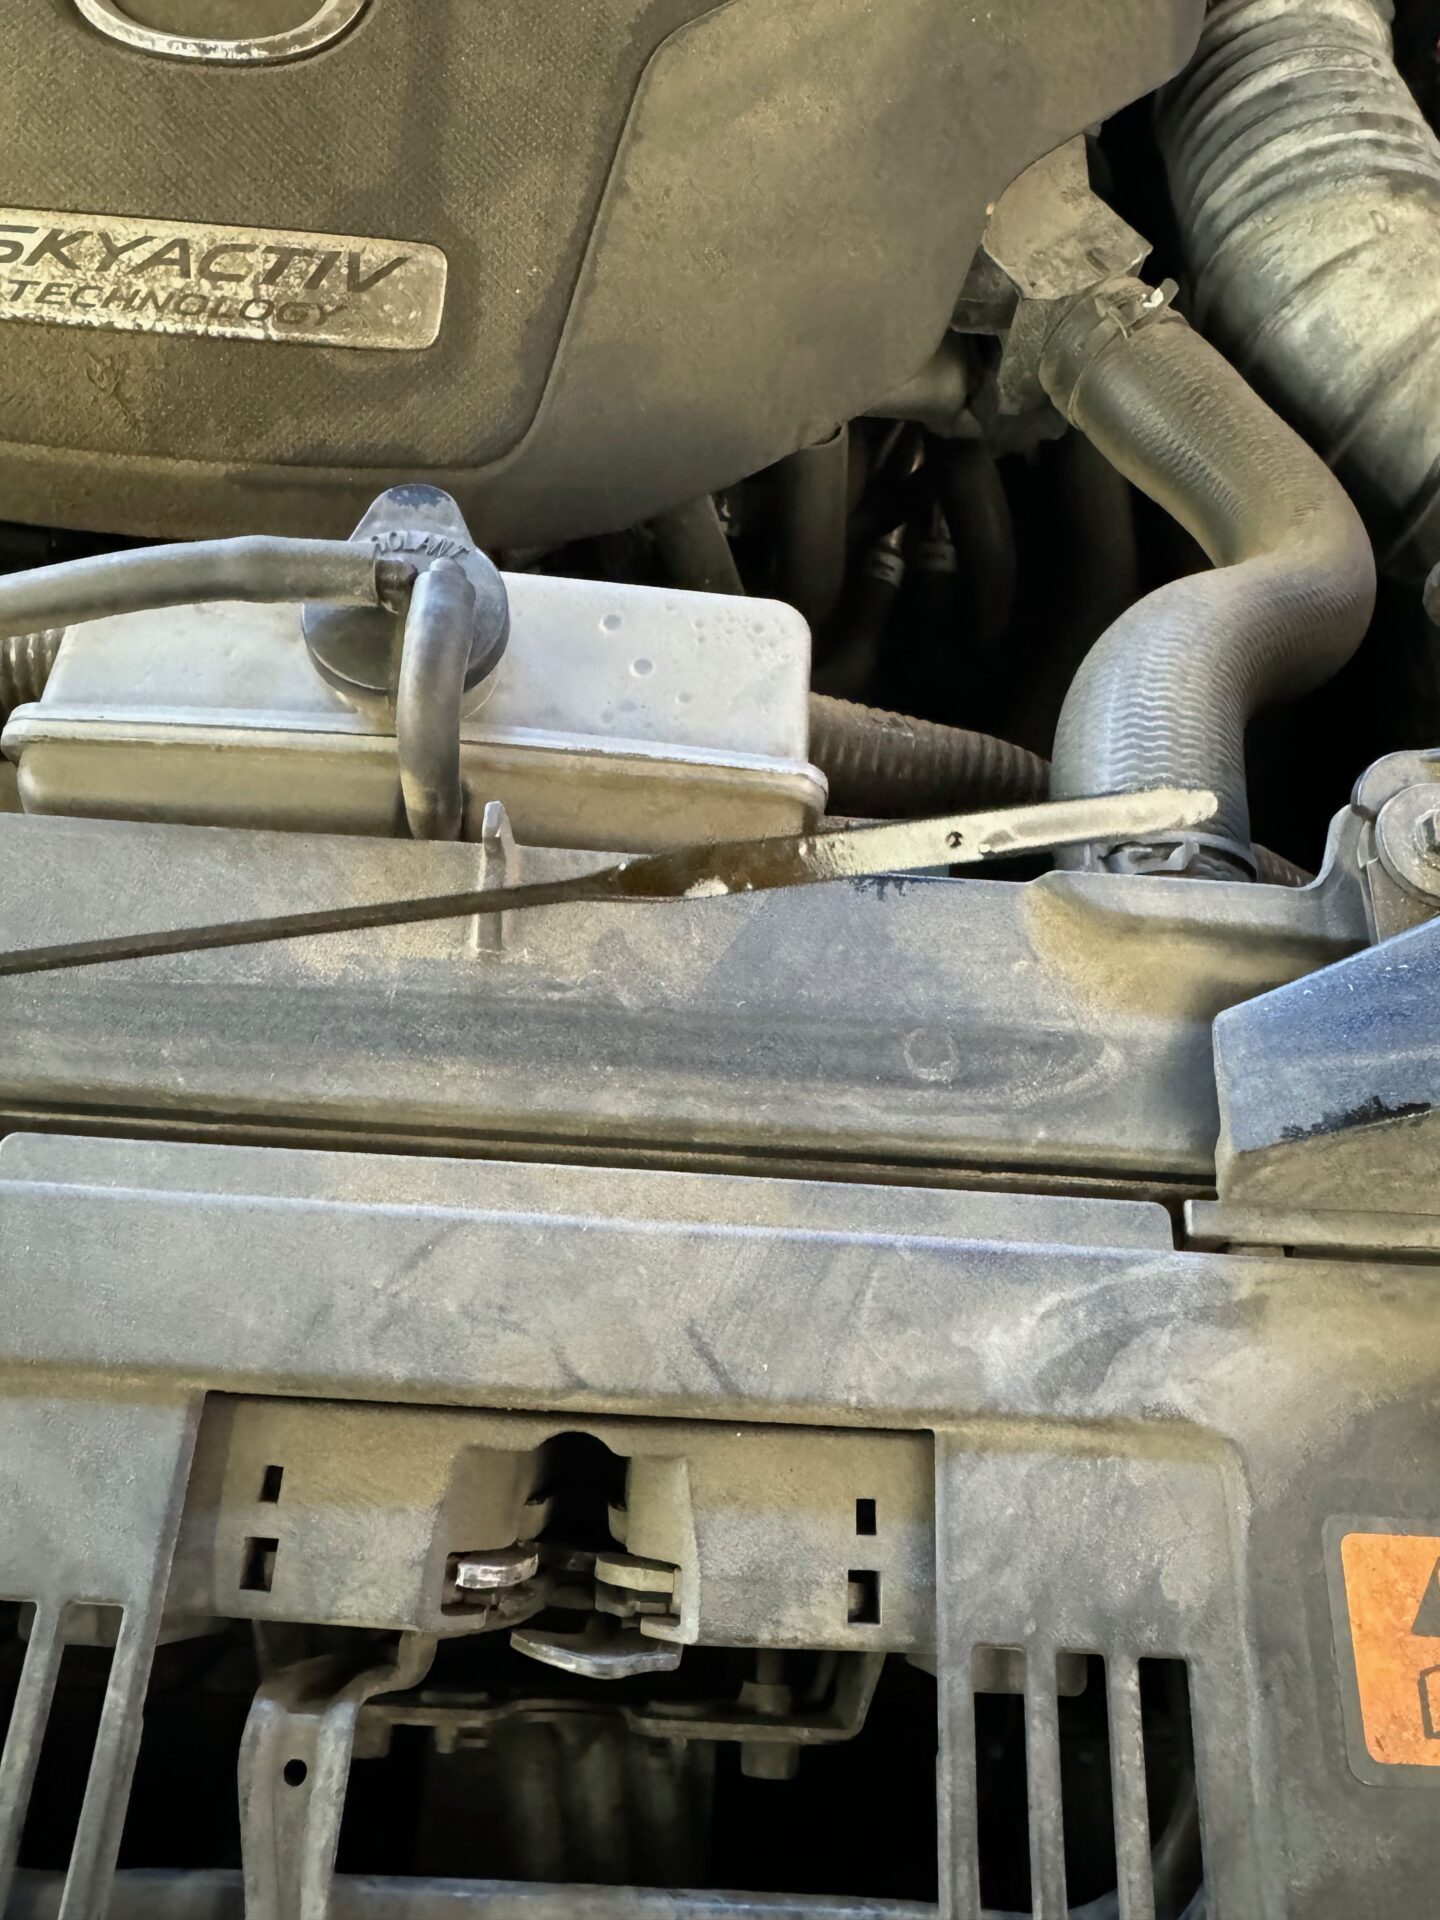
Check the oil level using the dipstick. Ensure the oil is at the recommended level and is clean. Dirty oil may indicate a lack of maintenance or neglect. Also, check for metal particles in the oil, which could be a sign of engine wear.
– Transmission Fluid:
For automatic transmissions, check the fluid with the engine running and the car in park or neutral. The fluid should be at the correct level and is pinkish or red in color. Brown or burnt-smelling fluid may indicate problems.
– Brake Fluid:
Inspect the brake fluid reservoir. The fluid should be clear or slightly yellow. Dark or dirty fluid can affect braking performance and might indicate deferred maintenance, such as a system flush.
– Coolant:
Check the coolant level in the reservoir and ensure the fluid is clean and the proper color (usually green, orange, or pink). A low level or contaminated fluid could indicate leaks or other cooling system issues.
Belts and Hoses
– Belts:
With the engine off, examine the serpentine or drive belts for any cracks, fraying, or wear. A worn or damaged belt can break, potentially leading to severe engine damage.
– Hoses:
Inspect radiator and heater hoses for cracks, bulges, or leaks. Squeeze the hoses gently; they should feel firm but not overly hard or soft. Soft or spongy hoses may indicate they need replacement.
Battery
– Corrosion:
Look for any corrosion around the battery terminals, which can interfere with the electrical connection. Corrosion appears as a white or blue-green powdery substance.
– Strength:
When starting the engine, make sure it turns over strongly. Watch for slow or sluggish engine cranking while starting.
Leaks
– Signs of Leaks:
Look under the car and around the engine bay for any puddles or wet spots. Common fluids to look for include oil (brown or black), transmission fluid (red or pink), coolant (green, orange, or pink), and brake fluid (clear to light brown). Leaks can indicate serious mechanical issues that may require costly repairs.
4. Mechanical Condition
Test Drive
– Smooth Acceleration:
Accelerate at different speeds and note if the car responds promptly without any hesitation or jerking. For example, uneven acceleration could indicate issues with the fuel system or engine.
– Braking:
Apply the brakes at various speeds to check their effectiveness. The car should stop smoothly and straight without pulling to one side. Listen for squealing or grinding noises, which may indicate worn brake pads or rotors.
– Handling:
Test the car’s steering responsiveness and alignment. The car should handle curves and turns smoothly without excessive play in the steering wheel. Check for vibrations or shaking, which could signal alignment issues or suspension problems.
– Unusual Noises:
Listen for any strange noises such as knocking, clicking, or whining from the engine, brakes, or suspension system. These sounds can hint at potential mechanical issues that might need immediate attention.
Brakes
– Functionality:
The brake pedal should feel firm, not spongy when pressed. A spongy pedal may suggest air in the brake lines or a problem with the master cylinder.
– Noise and Vibrations:
Any unusual noises like grinding or squealing could indicate worn-out brake pads or shoes. Vibrations during braking may point to warped rotors that need resurfacing or replacement.
Transmission
– Smooth Shifting:
During the test drive, shift through all gears (both automatic and manual transmissions) to ensure they engage smoothly without hesitation, slipping, or harshness. Rough or delayed shifting can signal transmission issues.
– Responsiveness:
The transmission should respond promptly to gear changes without any unusual noises like clunking or whining. These noises could indicate worn gears or other internal problems.
5. Vehicle History Report: A Crucial Step in Used Car Purchases
Once you’ve become serious about considering a particular car, investing in a CarFax report or a similar vehicle history report is well worth it when considering the purchase of that used car. This report provides comprehensive insights that help you make an informed decision and avoid potential pitfalls. Here’s why each aspect of the report is critical:
Title Status
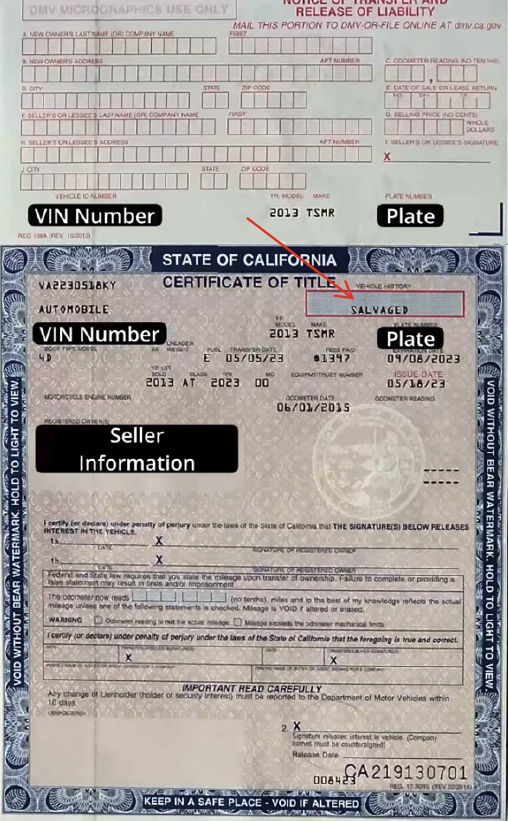
Ensuring the car has a clean title is paramount. A clean title shows that the insurance companies haven’t declared the car a total loss. A title branded with terms like “Salvaged” or “Rebuilt” indicates that the car has undergone significant repairs after extensive damage, which can affect its safety and resale value.
In addition to the history report, always ask the seller to allow you to examine the physical title to confirm its status.
VIN Check
Verify the VIN (Vehicle Identification Number) matches across all documents and the vehicle itself. Verify the VIN on all the vehicle’s VIN tags to confirm that someone hasn’t retagged the vehicle. Also, inspect the VIN tags on the vehicle for signs of tampering.
Accident History
A vehicle’s accident history reveals any past collisions. Major accidents can compromise the car’s structural integrity, leading to safety concerns and costly repairs down the line. By checking this history, you can gauge the severity of any damage and decide if the car is worth pursuing.
Ownership History
Reviewing the number of previous owners provides clues about the car’s condition. Vehicles with fewer owners are often receive better maintenance, as consistent care from a single owner typically results in fewer issues. Multiple owners in a short period could signal underlying problems or neglect.
Service Records
Consistent maintenance is a key indicator of a car’s longevity and reliability. Comparing the provided service records to the manufacturer’s recommended maintenance schedule helps verify that the vehicle has received the necessary care. Gaps or irregularities in maintenance can lead to mechanical issues, reducing the car’s value and dependability.
By taking these steps, you significantly reduce the risk of purchasing a problematic vehicle, ensuring a safer and more satisfying investment in your next car.
6. Professional Inspection
– Mechanic’s Evaluation:
Finally, once you’ve narrowed your search and are ready to buy, have a trusted mechanic inspect the car to identify any hidden issues that a casual inspection might miss.
Importance of a Used-Car Pre-Purchase Inspection
Regardless of where you find a used car, a pre-purchase inspection by a reputable auto repair shop is a critical step in the buying process. An inspection can reveal hidden issues that aren’t apparent during a casual test drive or visual inspection, such as:
At Temecula Auto Repair & Transmission, we understand the importance of buying a reliable used car. We’ve designed our Used Car Pre-purchase Inspection service to give you peace of mind by providing a comprehensive evaluation of the condition of the vehicle you’re considering for purchase. Our experienced mechanics will thoroughly check all critical components and provide you with a detailed report, helping you make an informed decision. For over ten years, we’ve proudly served Temecula, Murrieta, Winchester, French Valley, and surrounding communities.
Understanding Automotive Engine Failure: Causes, Symptoms, and Solutions
Engine failure will stop a vehicle in its tracks. Consequently, this can leave drivers stranded and frustrated. Therefore, knowing what causes an engine to fail and recognizing the signs can help drivers act early. Here, we’ll cover the common causes of engine failure, dive into the symptoms, and offer solutions.
Common Causes of Engine Failure
Overheating
Engine overheating is a serious issue. If ignored, overheating can lead to complete engine failure. The cooling system keeps the engine at a stable temperature by circulating coolant. When this system fails, heat can build up quickly. As a result, the excessive heat causes critical engine parts to warp or break. Let’s look at the common causes of overheating and why they lead to bigger problems.
Common Causes of Engine Overheating
1. Low Coolant Levels
– Coolant absorbs heat from the engine and helps keep temperatures in check. When coolant levels drop, the engine doesn’t get the cooling it needs. Leaks in the radiator, hoses, or water pump often cause low coolant.
– Solution: If the coolant level keeps dropping, check for leaks. Replace damaged hoses and refill coolant as needed.
2. Faulty Radiator
– The radiator is key to the cooling process. It dissipates heat from the coolant, allowing cooler liquid to flow back into the engine. A clogged or cracked radiator can’t release heat effectively, leading to overheating.
– Solution: Flush the radiator to clear out blockages or replace it if you see damage.
3. Failed Water Pump
– The function of the water pump is to circulate coolant through the engine and radiator. Therefore, if the pump fails, coolant can’t flow. Consequently, the engine overheats. This issue usually stems from worn bearings or leaks within the pump.
– Solution: Replace the water pump at the first sign of malfunction. Ignoring this part can lead to severe overheating.
4. Thermostat Malfunction
– The thermostat regulates when coolant flows into the engine. If it is stuck in the closed position, coolant can’t reach the engine to cool it down. Overheating creates a real risk of engine damage in this situation.
– Solution: Replace the thermostat as soon as you suspect it’s sticking. This fix is affordable and prevents further issues.
5. Blocked or Damaged Hoses
– Coolant flows through hoses that link the radiator, engine, and water pump. When these hoses crack, clog, or collapse, the coolant flow reduces. As a result, overheating occurs. Damage to hoses often happens due to old age or extreme temperatures.
– Solution: Inspect hoses for any signs of cracking or wear. Replace any damaged hoses to ensure a smooth flow of coolant.
6. Cooling Fan Issues
– The cooling fan pulls air through the radiator to help keep the coolant at a stable temperature. If the fan motor fails or a fuse blows, the fan can’t work properly. Without the fan, overheating happens quickly, especially in stop-and-go traffic.
– Solution: Test the fan motor and replace any blown fuses. If the fan isn’t running, consider coming in to see us.
The Consequences of Overheating Your Engine
When an engine overheats, severe damage can occur within minutes. For example, overheating can warp the cylinder head, crack the engine block, or cause head gasket failure. Any of these issues could lead to costly repairs or even total engine replacement. Therefore, addressing cooling system problems early is crucial to avoid these catastrophic outcomes.
The experts at Temecula Auto Repair & Transmission know how to diagnose and repair engine overheating issues. Serving Temecula, Murrieta, Winchester, and French Valley, our team ensures reliable solutions for cooling system malfunctions and engine protection.
Oil Leaks and Low Oil Levels
Low oil levels, primarily from oil leaks, pose a serious threat to engine health. Oil lubricates the moving parts inside the engine, keeping them from grinding against each other. When oil levels drop too low, friction builds up, causing heat and wear. Over time, this can lead to catastrophic engine failure. Understanding the common causes of oil leaks helps drivers take action before serious damage occurs.
Common Causes of Engine Oil Leaks
1. Worn-Out Gaskets and Seals
– Gaskets and seals keep oil from leaking out of the engine. Over time, these parts wear down or crack, especially in high-mileage engines. When they fail, oil escapes, often leading to leaks around the engine block or valve covers.
– Solution: Replace worn gaskets or seals at the first sign of a leak. Regular inspections help catch these issues early.
2. Loose or Damaged Oil Pan
– The oil pan, located beneath the engine, holds most of the engine’s oil. Road debris, speed bumps, or loose bolts can crack or dent the oil pan, creating leaks. Moreover, this damage often happens in older vehicles or those with lower clearance.
– Solution: Tighten oil pan bolts during regular maintenance. Replace a damaged oil pan if you see a visible crack or dent.
3. Faulty Oil Filter
– The oil filter keeps the oil clean by removing and filtering out contaminants. If the filter isn’t installed correctly or is damaged, oil can leak from the filter seal. Over time, a leaking oil filter can cause low oil levels.
– Solution: Replace the oil filter during each oil change. Install the filter is securely to avoid leaks.
4. Valve Cover Gasket Failure
– The valve cover gasket seals the top of the engine, preventing oil from leaking out. Age and heat can wear down the gasket, causing oil to seep from the valve cover. This is a common cause of oil leaks in older engines.
– Solution: Inspect and replace valve cover gaskets when necessary. This small fix prevents more significant engine issues.
5. Crankshaft and Camshaft Seal Wear
– The crankshaft and camshaft seals keep oil inside the engine. As they age, these seals become brittle, allowing oil to leak. Leaks from these seals often go unnoticed until oil levels drop significantly.
– Solution: Replace worn crankshaft and camshaft seals to maintain proper oil levels. A professional inspection at our shop can identify if these seals need attention.
The Consequences of Low Oil Levels
Low oil levels lead to increased friction and heat in the engine. Without enough oil, engine components wear faster, causing knocking or grinding sounds. Consequently, if ignored, low oil levels can cause parts to seize, resulting in total engine failure. Regular oil checks and timely repairs prevent these costly outcomes.
Temecula Auto Repair & Transmission specializes in diagnosing and fixing oil leaks before they become serious issues. Serving Temecula, Murrieta, Winchester, and French Valley, our team helps drivers keep engines running smoothly and avoid catastrophic failure.
Engine Misfires
An engine misfire occurs when one or more cylinders fail to ignite the air-fuel mixture at the right time. Misfires disrupt the engine’s power and efficiency, leading to poor performance. Additionally, if left unresolved, repeated misfires can damage engine components. Consequently, this may result in catastrophic engine failure. Here, we’ll cover the common causes of engine misfires and explain why addressing them early is crucial.
Common Causes of Engine Misfires
1. Faulty Spark Plugs
– It’s the spark plugs’ job to ignite the air-fuel mixture in each cylinder. Worn or dirty spark plugs can cause weak sparks or no spark at all. As a result, this leads to misfires. This is one of the most common and easily fixed causes of misfires.
– Solution: Replace spark plugs routinely, according to the vehicle manufacturer’s recommended interval. Besides, regular maintenance helps prevent misfires from occurring.
2. Bad Ignition Coils
– Ignition coils convert battery power into the voltage needed to ignite the fuel. When an ignition coil fails, it prevents the spark plug from firing, causing a misfire. For example, faulty ignition coils are common in high-mileage vehicles.
– Solution: Inspect ignition coils for signs of wear and replace them if needed. Regular checks can catch issues early.
3. Clogged Fuel Injectors
– Fuel injectors spray fuel into each cylinder for combustion. When clogged, injectors can’t deliver the correct amount of fuel. As a result, this leads to uneven combustion and misfires. Clogs often form from carbon buildup or dirty fuel.
– Solution: Clean or replace clogged fuel injectors. Also, using high-quality fuel can reduce buildup.
4. Low Fuel Pressure
– Fuel pressure must remain steady to ensure proper fuel delivery. Low fuel pressure, often caused by a failing fuel pump or clogged fuel filter, results in lean fuel mixtures and misfires. Inconsistent fuel pressure is particularly noticeable at high speeds.
– Solution: Test the fuel pressure regularly. Replacing a faulty fuel pump or fuel filter can prevent fuel-related misfires.
5. Vacuum Leaks
– Vacuum leaks disrupt the fuel-air mixture, causing the engine to run too lean and misfire. Cracked hoses or gaskets are typical sources of these leaks, often affecting the engine’s idle quality.
– Solution: Inspect hoses and gaskets for cracks or damage. Repair any leaks to keep the fuel-air mixture stable.
6. Worn Timing Belt or Chain
– The timing belt or chain synchronizes engine components to ensure proper cylinder firing. A worn timing belt can lead to misfiring as the engine’s timing becomes imprecise. Moreover, if it breaks, the engine can suffer catastrophic damage.
– Solution: Replace the timing belt or chain at recommended intervals. This small investment prevents misfires and extensive damage.
The timing belt is such a critical component. Broken timing belts are a leading cause of catastrophic engine failure. Thus, we’d like to spend a little more time discussing the timing belt in more depth.
Timing Belt Failure
The timing belt plays a crucial role in an engine, keeping the camshaft and crankshaft in sync. When the timing belt fails or breaks, the engine’s internal parts fall out of alignment. This misalignment often results in valves and pistons colliding, causing catastrophic engine damage. To avoid these serious issues, it’s essential to understand why timing belts fail and follow factory-recommended replacement intervals.
Common Causes of Timing Belt Failure
Wear and Tear Over Time
– Timing belts experience constant motion and friction as they rotate, which causes them to wear down gradually. Over time, this wear weakens the belt material, making it more prone to snapping or fraying.
– Solution: Replace the timing belt as recommended by your vehicle’s manufacturer, usually every 60,000 to 100,000 miles.
Oil Leaks on the Timing Belt
– Oil leaks from nearby seals or gaskets can drip onto the timing belt. Consequently, oil degrades the belt’s rubber material, increasing the chances of failure. Vehicles with high mileage are especially at risk for leaks.
– Solution: Repair any oil leaks as soon as they appear to protect the belt from damage. Also, regular engine checks can help detect leaks early.
Incorrect Belt Tension
– Proper tension is key for timing belt function. If the belt is too loose, it may slip, leading to misalignment. On the other hand, if it’s too tight, it can wear down faster or break. Timing belt tensioners, which maintain correct tension, can wear out, affecting the belt.
– Solution: Replace the tensioner when changing the timing belt. This ensures the new belt will have the proper tension.
Extreme Temperature Changes
– Temperature shifts can cause the timing belt’s rubber to expand and contract. As a result, cracks in the belt can occur. In other words, extremely high or low temperatures can speed up a timing belt’s demise, especially if the belt is nearing the end of its life.
– Solution: Store the vehicle in a climate-controlled environment when possible or inspect the belt more frequently in extreme climates.
Foreign Object Damage
– Road debris or broken engine parts can sometimes become trapped in the timing belt’s path, causing it to fray, tear, or even snap. These situations are rare but can be highly damaging.
– Solution: Regular inspections of the engine area can help catch any debris or loose parts that may harm the timing belt.
Why Following the Recommended Timing Belt Replacement Matters
Replacing the timing belt at the manufacturer’s recommended interval prevents unexpected failures. Ignoring this essential maintenance puts your engine at risk of severe damage. As a result, this can lead to costly repairs or complete engine replacement.
At Temecula Auto Repair & Transmission, we specialize in timing belt replacements and repairs. Serving Temecula, Murrieta, Winchester, and French Valley, our experienced team helps protect engines from the risks of timing belt failure, keeping your vehicle running smoothly and safely.
Also, see Interference Engine for more information about the consequences of a broken timing belt.
Now, back to the overall issue of engine misfires…
The Risks of Ignoring Engine Misfires
Repeated misfires put stress on the engine and can lead to overheating, poor fuel economy, and costly repairs. Components like the catalytic converter or pistons can suffer damage due to unburned fuel or inconsistent combustion. Ignoring misfires raises the risk of a total engine breakdown. Therefore, immediate diagnosis and repair of misfires are vital.
At Temecula Auto Repair & Transmission, our team is highly skilled in diagnosing and fixing engine misfires effectively. Serving the communities of Temecula, Murrieta, Winchester, and French Valley, we provide reliable solutions to keep engines running smoothly and avoid catastrophic failures.
Head Gasket Failure
The cylinder head gasket seals the engine block and cylinder head, keeping oil and coolant from mixing while maintaining compression in the cylinders. When a head gasket fails, these fluids can leak into areas they shouldn’t. In turn, this leads to severe engine issues. In some cases, head gasket failure can even cause complete engine failure. Understanding what causes this problem helps drivers recognize early signs and act quickly.
Common Causes of Head Gasket Failure
1. Engine Overheating
– An overheating engine is a cause of head gasket failure. When the engine gets too hot, the gasket material can weaken or crack. This often happens due to a failing cooling system, such as a broken water pump or radiator leak.
– Solution: Regularly inspect and maintain the cooling system to prevent overheating. Also, address any cooling issues immediately.
2. Poor Installation
– A poorly installed head gasket may not seal properly, which can lead to leaks. Improper installation often occurs with low-quality replacement parts or incorrect torque during installation.
– Solution: Always use high-quality parts and ensure a qualified technician performs the installation.
3. High Engine Mileage
– High-mileage engines experience more wear and tear, making the head gasket more vulnerable to failure. For example, heat cycles, friction, and general use weaken the gasket over time. This is especially true in engines with 100,000 miles or more.
– Solution: Inspect the head gasket regularly as your vehicle ages, especially if it has high mileage. Early signs of wear help prevent total failure.
4. Combustion Issues
– Pre-ignition or detonation, which causes the air-fuel mixture to ignite too early, can create high pressure inside the cylinders. This pressure puts extra stress on the head gasket, often leading to cracks or blowouts.
– Solution: Keep up with regular engine maintenance to prevent combustion issues. Properly tuned engines reduce this risk.
5. Coolant and Oil Mixing
– Mixing coolant and oil causes contamination in both systems, leading to corrosion and buildup. These issues weaken the head gasket and can cause leaks over time. Oil leaks or coolant leaks into the combustion chamber often cause this issue.
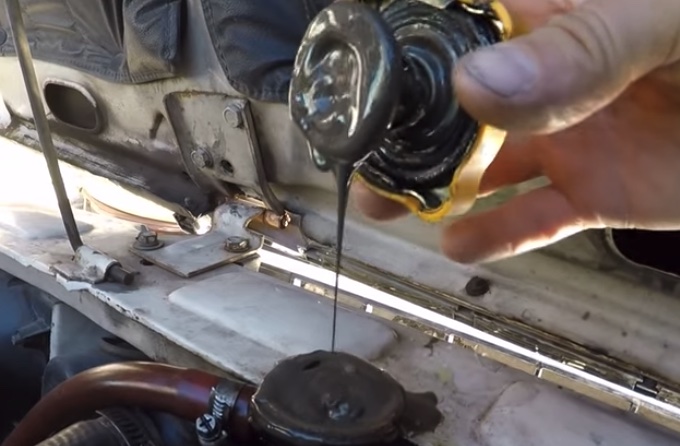
– Solution: Check coolant and oil levels frequently. If you notice a milky substance on the oil cap, seek service immediately.
The Risks of Ignoring Head Gasket Failure
Ignoring a failing head gasket can lead to more severe engine damage. Overheating, poor performance, and potential engine seizure can result, especially if oil and coolant mix within the engine. The costs to repair or replace an engine affected by a blown head gasket are high, so early attention is essential.
Engine Rebuilding vs. Engine Replacement: Choosing the Right Solution
When an engine suffers serious damage, drivers often face two main options: engine rebuilding or engine replacement. Each option has its pros and cons, depending on the extent of the damage and the vehicle’s condition. Understanding the differences helps drivers make the best choice to keep their cars running reliably.
What Is Engine Rebuilding?
Engine rebuilding involves taking apart the engine, inspecting each part, and replacing damaged components. During a rebuild, our team replaces parts like pistons, valves, bearings, and gaskets. We also clean, repair, and restore components to return the engine to optimal performance. Therefore, this process allows for a more customized approach to repair. Moreover, this keeps as much of the original engine as possible.
Rebuilding an engine is often a good option when the engine has minor to moderate damage. It can also be cost-effective if only a few parts need replacement. Plus, rebuilt engines can extend the life of older or classic vehicles, keeping their original engines intact.
When to Consider Engine Replacement
Engine replacement is the process of removing the old engine and installing a new, rebuilt, or used one. Replacing the engine might be the best choice when the original engine has severe damage. This option eliminates the need for extensive repairs and ensures a fully functional engine without unknown issues.
New engines offer a fresh start for a vehicle, providing like-new performance. Used engines, while less costly, may have some wear but are typically in better condition than a heavily damaged engine. Replacement is often faster than a rebuild, as it avoids the need for in-depth inspections and repairs of every part.
Key Differences Between Rebuilding and Replacing an Engine
Cost: Engine rebuilding may be cheaper if damage is minimal. However, costs can add up with extensive repairs. On the other hand, engine replacement, particularly with a new engine, can be more expensive but may save on future repairs.
Time: Rebuilding an engine takes time, especially when parts need sourcing or repairs are complex. However, engine replacement is often quicker, as it involves swapping engines rather than rebuilding one.
Longevity: A rebuilt engine can last a long time if done correctly. Nonetheless, wear on the original parts can affect its lifespan. In comparison, a new engine may last longer, while a used one may offer years of reliable use at a lower cost.
Which Option Is Right for You?
Choosing between rebuilding and replacing depends on the engine’s condition, the vehicle’s age, and your budget. A rebuilt engine preserves more of the car’s original parts. This is ideal for classic or vintage vehicles. On the other hand, replacing the engine can be a smart move for modern cars with significant engine damage.
Temecula Auto Repair & Transmission specializes in both engine rebuilding and engine replacement, providing expert solutions for all levels of engine damage. Serving Temecula, Murrieta, Winchester, and French Valley, our team ensures the right repair choice to keep your car performing at its best.
Frequently Asked Questions
What is the most common cause of engine failure?
The most common causes are overheating and running low on oil, almost always tied to a maintenance lapse. Catching small problems early is what prevents a full failure.
What is catastrophic engine failure?
It is a complete internal failure of the engine, often a thrown rod or seized block. It usually cannot be fixed without a rebuild or full replacement.
What can damage a car engine?
Running low on oil, overheating, ignoring a misfire, and skipping a timing belt service are the big ones. Each puts the engine at risk of major internal damage.
What is internal engine failure?
Internal failure means damage to the moving parts inside the engine such as pistons, rods, or bearings, as opposed to external parts like belts or hoses.
Can a blown or seized engine be fixed?
Often yes, through a rebuild or a replacement engine, depending on the damage. After a diagnosis we will tell you which path makes sense for your vehicle.
Understanding Your Check Engine Light: Causes, Symptoms, and Solutions
The Check Engine Light (CEL) on your dashboard can seem intimidating. However, it serves as an important warning system in your car. When the light turns on, it’s alerting you to an issue that needs attention. So, let’s break down what the Check Engine Light means. Also, we’ll explore the common reasons it comes on and the symptoms you might notice when it does.
What is the Check Engine Light?
The Check Engine Light is part of your vehicle’s onboard diagnostic system (OBD). It alerts you when something goes wrong with your car’s engine, emissions, or other components. Thus, when the system detects an issue, the light will illuminate. This indicates that you should have your car checked. Although some drivers may feel they can ignore it, this light is there for a reason. In other words, addressing a Check Engine Light early can help prevent more costly repairs.
Common Causes of the Check Engine Light
Several issues can trigger your Check Engine Light. Here are some of the most common causes:
Loose or Damaged Gas Cap
A loose gas cap may seem minor. However, it can actually cause your Check Engine Light to turn on. When the gas cap is not fully tight, it allows fuel vapors to escape. Consequently, this affects your car’s fuel system. As a result, this triggers the Check Engine Light. Tightening the cap might solve this issue. However, if the light remains on, the cap may need replacement.
Faulty Oxygen Sensor
Oxygen sensors are critical in a car’s performance and fuel efficiency. These sensors monitor the oxygen levels in the exhaust gases. Thus, they help the engine manage fuel and emissions. When an oxygen sensor fails, it can lead to noticeable problems that may trigger the Check Engine Light. Therefore, knowing how oxygen sensors work and the signs of a bad one can help drivers avoid potential issues.
Purpose and Function of Oxygen Sensors
Oxygen sensors are part of a vehicle’s emissions system. They measure the oxygen levels in exhaust gases after combustion. By analyzing these levels, the engine control module (ECM) adjusts the air-fuel mixture for better efficiency and reduced emissions. Most importantly, proper oxygen levels keep the engine running smoothly and improve fuel economy. In most cars, there are multiple oxygen sensors. There is one before the catalytic converter and one after it. Each sensor provides real-time feedback to the ECM. This helps the ECM make accurate adjustments.
Common Causes of Oxygen Sensor Failure
Several factors can lead to a failing oxygen sensor. Understanding these causes can help prevent future issues.
1. Age and Wear
Over time, oxygen sensors wear out. Many sensors become faulty after 60,000 to 100,000 miles. Moreover, frequent driving and engine use degrade sensor materials. Consequently, this leads to reduced accuracy. Therefore, replacing sensors at regular intervals can help avoid unexpected failures.
2. Contamination
Contaminants such as oil, antifreeze, and fuel additives can damage the sensor’s tip. This contamination affects the sensor’s ability to measure oxygen levels accurately. Thus, using high-quality fuel and regularly maintaining your engine helps reduce this risk.
3. Excessive Fuel
A fuel-rich engine burns more fuel than necessary. As a result, it releases unburned particles into the exhaust. These particles can coat the oxygen sensor. In turn, this reduces the sensor’s sensitivity and accuracy. Thus, keeping the fuel system clean and avoiding prolonged fuel-rich conditions can help.
4. Fluid Leaks
Leaks in the cooling system or oil leaks sometimes reach the oxygen sensors. Fluid leaking on the sensor will damage it. For example, when leaking fluids reach the sensor, it can disrupt its readings and lead to failure. So, addressing fluid leaks quickly can help prevent this issue.
Ensuring Oxygen Sensor Health
Ensuring your oxygen sensors are in good condition will keep your emissions control system working at its best. Additionally, keeping up with routine maintenance can save you from costly repairs. So, if you suspect an oxygen sensor problem or see the Check Engine Light, call us right away for an accurate diagnosis.
Malfunctioning Catalytic Converter
The catalytic converter is a crucial component in your car’s emissions system. It reduces harmful emissions, helping the car meet environmental standards. Therefore, when the catalytic converter fails, it can lead to poor performance. Also, increased emissions, and potential engine damage may occur. On the other hand, understanding how the catalytic converter works and the things that can cause it to fail will help you maintain your catalytic converter and avoid costly repairs.
Purpose and Function of the Catalytic Converter
The catalytic converter is a critical component in your vehicle’s emissions system. It transforms harmful gases, such as carbon monoxide, hydrocarbons, and nitrogen oxides, into less harmful substances. Inside, the catalytic converter has a ceramic structure coated with precious metals like platinum, palladium, and rhodium. These metals act as catalysts, causing chemical reactions that convert harmful gases into water vapor, carbon dioxide, and nitrogen. Located between the engine and the muffler, the catalytic converter plays a key role in reducing pollution from your vehicle’s exhaust.
Common Causes of Catalytic Converter Failure
Several issues can lead to a failed catalytic converter. Knowing these causes can help prevent expensive repairs and keep your emissions system working well.
1. Engine Misfires
Misfiring occurs when fuel fails to ignite in the engine cylinders, sending unburned fuel into the exhaust system. Consequently, when this unburned fuel reaches the catalytic converter, it causes overheating, which can melt the converter’s internal parts. Thus, fixing engine misfires quickly helps protect the catalytic converter.
2. Fuel-Rich Conditions
A fuel-rich condition means the engine burns more fuel than necessary. This excess fuel doesn’t burn completely. In turn, this causes a buildup in the catalytic converter. Over time, this buildup clogs the converter, reducing its effectiveness and leading to failure.
3. Contaminants in the Exhaust
Contaminants such as oil or coolant sometimes leak into the exhaust system, reaching the catalytic converter. These fluids coat the converter’s surface, reducing its ability to function. Common causes of contamination include leaky head gaskets or faulty piston rings. Regular maintenance can help detect and prevent these leaks.
4. Age and Wear
Like many car parts, catalytic converters wear out over time. Most converters last between 70,000 to 100,000 miles. However, heavy use or constant short trips can reduce their lifespan. Replacing old converters helps keep your emissions system in top shape.
5. Clogged Oxygen Sensors
Faulty or clogged oxygen sensors can affect the air-fuel mixture, causing the engine to run poorly. As a result, this imbalance in the air-fuel mixture will impact the catalytic converter. In turn, this will cause buildup and damage to the catalytic converter over time. Replacing or cleaning oxygen sensors as needed can help extend the life of your catalytic converter.
Maintaining Your Catalytic Converter
Regular maintenance may be key to extending the life of your catalytic converter. Additionally, addressing any engine issues promptly and performing routine inspections will keep your emissions system functioning efficiently. If you suspect a problem with your catalytic converter, Contact us right away to prevent further damage and ensure a cleaner, smoother ride.
Worn Spark Plugs or Ignition Coils
Spark plugs and ignition coils play an essential role in a vehicle’s ignition system. Working together, they ensure the engine starts smoothly and operates efficiently. When spark plugs or ignition coils fail, the Check Engine Light often illuminates, alerting drivers to an issue that needs attention. Knowing the purpose, function, and causes of spark plug and ignition coil failure helps drivers avoid engine trouble and keep peak performance.
Purpose and Function of Spark Plugs
Spark plugs are small but vital components in every gasoline engine. Spark plugs emit the spark that ignites the air-fuel mixture in your engine’s combustion chamber. This spark creates a controlled explosion, which powers the engine. Each cylinder has its own spark plug, and timing the spark in each plug is key for engine efficiency. In other words, when the spark plugs function correctly, the engine operates smoothly. Also, a properly running engine delivers better fuel economy and reduces emissions.
Purpose and Function of Ignition Coils
Ignition coils provide the high voltage needed to create the spark in the spark plugs. They take the car’s 12-volt battery power and boost it to thousands of volts, which is enough to jump the spark plug gap. Each coil connects to its respective spark plug, ensuring the spark plugs ignite on time. Working together, ignition coils and spark plugs allow the engine to run efficiently.
Common Causes of Spark Plug and Ignition Coil Failure
When spark plugs or ignition coils fail, drivers may notice rough engine performance, poor gas mileage, or a Check Engine Light. Several common issues contribute to these failures. However, regular maintenance can often prevent the failures.
1. Wear and Tear
Over time, spark plugs wear down. For instance, most spark plugs last around 30,000 to 100,000 miles, depending on the type and driving habits. As spark plugs age, the gap widens, weakening the spark. Therefore, regularly replacing spark plugs helps avoid performance issues.
2. Oil Leaks
Oil leaks into the combustion chamber can coat the spark plugs, reducing their effectiveness. When oil fouls the spark plugs, they fail to spark properly, leading to engine misfires and Check Engine Light activation. Thus, fixing oil leaks promptly helps prevent spark plug damage.
3. Heat Damage
Ignition coils operate in high-temperature environments inside the engine compartment. Consequently, excessive heat causes coils to crack or fail prematurely, especially in older vehicles. Therefore, keeping the cooling system in good condition reduces the risk of coil damage.
4. Fuel System Issues
A fuel-rich condition can lead to incomplete combustion, which fouls the spark plugs with carbon deposits. As a result, when there’s carbon on the spark plugs, they can’t create a clean spark. In turn, this causes engine misfires and rough idling. Proper fuel system maintenance can help avoid this issue.
5. Moisture Exposure
Moisture entering the engine compartment can lead to ignition coil failure. For example, water exposure causes the coils to short out or corrode, leading to misfires and performance issues. Thus, keeping the engine bay dry helps protect ignition coils.
6. Using the Wrong Parts
Not all spark plugs and ignition coils are compatible with every vehicle. Using the wrong type or size can cause misfires, poor performance, and even damage to other engine components. So, always choose parts that meet your vehicle’s specifications.
Signs of Failed Spark Plugs or Ignition Coils
When spark plugs or ignition coils fail, the engine may misfire, idle roughly, or experience reduced power. Besides the Check Engine Light illuminating, drivers may also notice poor fuel efficiency. Ignoring any of these symptoms can lead to the development of more serious problems in the engine. Thus, regular maintenance and early detection can prevent costly repairs and keep your vehicle running smoothly. If you experience any of these symptoms, consult us today for accurate diagnostics and timely repairs.
Mass Airflow Sensor Problems
The mass airflow (MAF) sensor is essential to a vehicle’s engine management system. It measures the amount of air entering the engine, allowing the engine control module (ECM) to adjust the air-fuel mixture for optimal performance. When the MAF sensor fails, it often triggers the Check Engine Light, indicating an issue that needs attention. Knowing the purpose, function, and common causes of MAF sensor failure can help drivers maintain engine health and avoid costly repairs.
Purpose and Function of the Mass Air Flow Sensor
The MAF sensor calculates the volume and density of the air flowing into the engine. Most importantly, accurate air measurement helps the ECM adjust the fuel injection for an ideal air-fuel ratio. This ratio affects everything from fuel economy to emissions and overall engine performance. When working correctly, the MAF sensor ensures efficient combustion, providing smoother acceleration and improved fuel efficiency.
Common Causes of Mass Air Flow Sensor Failure
A failing MAF sensor causes poor engine performance and often activates the Check Engine Light. Several factors contribute to MAF sensor failure, many of which are preventable.
1. Dirt and Debris Buildup
Over time, dirt and debris accumulate on the MAF sensor. As a result, this obstructs the sensor’s ability to measure air accurately. For example, a clogged sensor gives incorrect readings, which causes rough idling and poor fuel economy. Consequently, this may trigger the Check Engine Light. One function of the engine air filter is to clean the air flowing to the Mass Airflow Sensor. Therefore, regular air filter changes help keep the sensor clean.
2. Oil Contamination
Oil from the engine can sometimes reach the MAF sensor. This is likely to occur if the air filter is oily or if there’s an oil leak. Oil coats the sensor, affecting its sensitivity. Thus, cleaning or replacing the sensor can help restore accurate readings and improve performance.
3. Air Filter Issues
A dirty or poorly fitted air filter can restrict airflow to the sensor, causing it to misread the air volume. As a result, this misreading leads to an incorrect air-fuel mixture, which may cause poor performance and a Check Engine Light. Replacing the air filter regularly prevents this issue.
4. Moisture Damage
Exposure to moisture can damage the delicate elements inside the MAF sensor. For example, if water enters the air intake, it can short-circuit or corrode the sensor. Therefore, keeping the air intake system dry helps prevent moisture damage.
5. Electrical Problems
Loose or damaged wiring connected to the MAF sensor can disrupt readings. This causes erratic performance, rough idling, and a potential Check Engine Light. Thus, inspecting and securing electrical connections around the sensor helps avoid this problem.
Symptoms of a Failing Mass Air Flow Sensor
When a Mass Airflow sensor fails, drivers may notice rough idling, reduced fuel efficiency, or sluggish acceleration. The Check Engine Light will likely illuminate, signaling this problem in the air intake system. Addressing these symptoms early can prevent further damage to the engine. So, if you experience these issues, Book An Appointment with us to diagnose and fix any MAF sensor problems, ensuring smoother performance and better fuel economy.
Vacuum Leaks Setting the Check Engine Light
Leaking vacuum in a vehicle’s engine can lead to poor performance and often trigger the Check Engine Light. Vacuum hoses play a critical role in managing engine efficiency by carrying and controlling airflow within the engine. When these hoses develop leaks, the engine’s air-fuel ratio becomes unbalanced, affecting overall performance. Understanding the purpose of vacuum hoses and the causes of vacuum leaks can help drivers identify and address issues before they worsen.
Purpose and Function of Vacuum and Vacuum Hoses
Vacuum systems in a vehicle’s engine control various functions. These functions range from braking to emissions management. Vacuum hoses connect different parts of the engine to distribute air pressure, which powers components like the brake booster and fuel regulating devices. The engine’s intake manifold creates the vacuum needed to pull air through the hoses. The vacuum system maintains optimal engine performance and fuel efficiency by routing airflow to its intended destination. Thus, properly functioning hoses are essential for a smooth-running engine and stable idle.
Common Causes of Vacuum Leaks
When a vacuum leak occurs, unmetered air enters the engine. Consequently, this causes an incorrect air-fuel mixture. In turn, this imbalance results in poor engine performance and often triggers the Check Engine Light. Here are some common causes of vacuum leaks:
1. Cracked or Worn Hoses
Over time, vacuum hoses can crack or wear out due to heat and age. Small cracks allow air to enter the system, disrupting airflow. Therefore, replacing old hoses helps prevent leaks and keeps the system airtight.
2. Loose Connections
If vacuum hose connections are not secure, air can seep into the engine, creating a leak. Vibration from the engine can loosen connections over time, leading to leaks. Pinpointing and securing loose hose connections will remedy this issue.
3. Intake Manifold Gasket Failure
The intake manifold gasket seals the joint between the intake manifold and the engine. A faulty intake manifold gasket can allow unwanted air to leak into the engine. If this happens, it will affect engine performance. Thus, to restore proper vacuum pressure, the gasket will have to be replaced. In turn, this improves engine function.
4. Faulty PCV Valve
The Positive Crankcase Ventilation (PCV) valve helps regulate air pressure in the engine’s crankcase. When the PCV valve fails, it can cause a vacuum leak. Oftentimes, replacing the PCV valve is a simple fix that improves performance.
5. Throttle Body Leaks
Sometimes, leaks occur around the throttle body, which controls airflow into the engine. Worn throttle body gaskets allow unmetered air to enter the system. However, replacing the gasket or cleaning the throttle body resolves this issue.
Symptoms of Vacuum Leaks in Your Engine
When a vacuum leak occurs, drivers may notice rough idling, decreased fuel efficiency, or poor acceleration. The Check Engine Light usually illuminates, signaling an imbalance in the air-fuel ratio. Addressing vacuum leaks early helps prevent further engine issues and keeps the vehicle running smoothly. If you notice these symptoms, schedule an appointment with us for accurate diagnostics and repairs.
Symptoms of a Check Engine Light Issue
When the Check Engine Light turns on, you may notice other symptoms that can help pinpoint the issue. Some of these include:
– Rough Idling
If your engine doesn’t run smoothly, it may be due to a problem that also triggers the Check Engine Light. A rough idle often points to a misfire or fuel system problem.
– Poor Gas Mileage
Have you noticed a sudden drop in fuel efficiency? Many of the issues that cause the Check Engine Light to come on can affect gas mileage. For example, faulty oxygen sensors, mass airflow sensors, and spark plugs are common culprits.
– Decreased Engine Power
A sluggish or unresponsive engine may indicate a problem. Issues with the catalytic converter or spark plugs often cause the Check Engine Light to come on, along with decreased power.
– Unusual Engine Sounds
If you hear knocking or hissing, it could mean trouble. For example, unusual sounds, combined with the Check Engine Light, often suggest an exhaust leak or spark plug problem.
– Smells from the Exhaust
Smelling gas or rotten eggs from the exhaust indicates something is wrong. This odor is likely due to a problem with the catalytic converter. When combined with the Check Engine Light, it’s a sign to bring your car in for an evaluation.
Steps You Can Take When the Check Engine Light Comes On
When you see the Check Engine Light, it’s time to act. Here’s what you can do:
1. Check the Gas Cap
Start with the easiest fix. Make sure your gas cap is tight. If the cap was the culprit, then the Check Engine Light may turn off after a few trips. If it doesn’t, the problem lies elsewhere.
2. Watch for Other Symptoms
Pay attention to any unusual sounds, smells, or driving issues. Providing as much of this information as possible can help our technician diagnose the problem faster.
3. Get a Professional Diagnostic Test
If the light remains on, schedule a visit to our shop. Our Certified Technicians use a special diagnostic tool to read the error codes from your car’s computer. These codes reveal what system triggered the light, allowing for accurate diagnostic testing and repairs.
Professional Check Engine Light Services in Temecula, Murrieta, Winchester, and French Valley
If your Check Engine Light has come on, don’t wait! At Temecula Auto Repair & Transmission, we’re experts in diagnosing and fixing Check Engine Light problems. Serving the communities of Temecula, Murrieta, Winchester, and French Valley, our experienced team has the skills and tools needed to get you back on the road safely.
What are the most common reasons a check engine light comes on?
The most common causes are a loose or failing gas cap, a failing oxygen (O2) sensor, a bad catalytic converter, worn spark plugs or ignition coils, and a faulty mass airflow sensor.
Is it safe to drive with the check engine light on?
A steady light means get it checked soon. A flashing light means stop driving, it signals an active misfire that can damage the catalytic converter.
Why does my car feel like it is skipping with the check engine light on?
That usually points to a misfire from worn spark plugs, ignition coils, or a fuel delivery issue. Have it diagnosed quickly to protect the catalytic converter.
How much does a check engine light diagnostic cost in Temecula?
A diagnostic gets you an exact answer before any repair. Call us to book one and we will give you a clear quote before work begins.
Can a bad or loose gas cap trigger the check engine light?
Yes. A loose, cracked, or missing gas cap is one of the most common triggers, and the cheapest to fix.
Stay Safe on the Road: Essential Vehicle Maintenance Tips for National School Bus Safety Week 2024
Every year, National School Bus Safety Week reminds us of the importance of protecting our most vulnerable passengers: children. This event is held from October 21 to October 25, 2024. It encourages drivers and communities to prioritize school bus safety. As a motorist, you can play a critical role in keeping students safe on the road. You can do so by following traffic laws and ensuring your car is in top condition. Let’s explore how motorists can contribute to school bus safety. We’ll focus on vehicle care and safe driving habits.
The Importance of School Bus Safety
Millions of children travel to and from school by bus each day. Although buses are one of the safest modes of transportation, accidents can still happen. This is especially true when other drivers fail to exercise caution. According to the National Highway Traffic Safety Administration (NHTSA), an average of 128 people die in school-transportation-related crashes every year. By being more aware and mindful of school buses, you can help prevent accidents and protect children’s lives.
How Motorists Can Ensure School Bus Safety
1. Stop for Flashing Red Lights
When a school bus displays flashing red lights and extends its stop sign, drivers in both directions must stop. Children are likely boarding or getting off the bus at this time. Therefore, failing to stop can lead to severe accidents. Always prepare to stop when approaching a bus from either side.
2. Maintain a Safe Following Distance
Keeping a safe distance behind a school bus is critical. Tailgating buses as they make frequent stops increases the risk of a collision. Ensure you maintain at least three seconds of following distance. This will give you ample time to react to any sudden stops.
3. Watch for Children Around the Bus
When children get excited and distracted, they can be unpredictable. Oftentimes, they may cross the street suddenly or appear from behind a parked vehicle. Therefore, always scan your surroundings when you see a school bus. Also, drive slowly to avoid any accidents. Be especially careful in school zones and neighborhoods.
Car Care Tips for Safer Driving Near School Buses
Maintaining your vehicle is crucial to ensuring school bus safety. Proper car care can enhance your ability to stop quickly, maneuver effectively, and avoid accidents. Here are some tips on how to keep your car in good condition for safer driving:
1. Check Your Brakes Regularly
With National School Bus Safety Week 2024 here, the spotlight is once again on road safety. One essential aspect of road safety that every motorist should prioritize is brake maintenance. Properly functioning brakes can mean the difference between avoiding an accident and causing one. This is especially true when near school buses and children. In fact, checking your brakes during this important week ensures your vehicle’s safety. Additionally, proper brake maintenance helps protect children who rely on school buses every day.
Understanding Brake Wear
Brakes are a crucial part of any vehicle’s safety system. Over time, brakes wear down. Brake pads create friction. This friction slows down and stops your vehicle. However, the constant pressure and friction they endure mean they gradually wear thin. When brake pads become too worn, they lose their ability to stop the car quickly. This is especially dangerous in school zones or when driving near school buses.
Common signs of brake wear include:
A. Squeaking or Squealing Sounds
These sounds indicate that your brake pads are thinning out. Oftentimes, brake noises indicates a need for immediate attention.
B. Grinding Noises
If you hear grinding when applying the brakes, it’s likely that your brake pads are completely worn. The noise could be metal scraping against metal. As a result, this damages your rotors and also compromises your braking ability.
C. Reduced Responsiveness
If your vehicle takes longer to stop than usual, worn brake pads may be the cause. This is especially dangerous when driving in areas with school buses, where sudden stops can happen frequently.
Brake Safety and School Bus Zones
Driving near school buses requires extra caution. Buses make frequent stops, and children may suddenly cross the street. In such situations, your brakes need to be in top condition. Worn brakes can increase stopping distance. Oftentimes, this can lead to accidents.
During National School Bus Safety Week, it’s vital to recognize that stopping for a school bus is both a legal requirement and a moral responsibility to protect the lives of young children. Thus, properly maintained brakes ensure that when a bus stops, you can stop, too.
Why Regular Brake Inspections Matter
Having your brakes checked regularly helps detect wear early. This allows you to replace brake pads or address other issues before they become serious. During an inspection, our mechanic will:
– Measure brake pad thickness to ensure they meet safety standards.
– Inspect the brake rotors for damage or warping.
– Check for brake fluid leaks, which can reduce the pressure needed to apply your brakes effectively.
The Role of Brake Fluid in Brake Safety
Besides brake pad wear, your brake fluid also plays an important role in ensuring your car stops efficiently. Brake fluid transfers the force from your foot on the pedal to the brakes themselves. In time, brake fluid becomes contaminated with copper content and moisture. Consequently, this will reduce its effectiveness. This is especially concerning when driving near school buses. Remember, every second counts.
Having your brake fluid inspected and flushed periodically ensures that your braking system operates smoothly. Clean brake fluid increases your ability to stop promptly. In turn, this reduces the risk of accidents in high-traffic areas near schools.
In conclusion, as National School Bus Safety Week 2024 highlights the importance of protecting children on the road, motorists must ensure their brakes are in optimal condition. Brake wear can happen gradually. However, the impact of failing brakes can come on suddenly with catastrophic results. Therefore, keeping up with regular brake inspections and addressing any signs of wear will help safeguard both yourself and the children who rely on school buses every day.
Keep your brakes in top condition with expert brake inspections and repairs at Temecula Auto Repair & Transmission. Serving Temecula, Murrieta, Winchester, and French Valley, our team ensures your vehicle stops safely every time. Don’t wait for a problem. Schedule your brake service today for smoother, safer driving!
2. Inspect Your Tires
During National School Bus Safety Week 2024, safety on the road becomes a top priority.
We rightly place much of the focus on driving habits and obeying traffic laws. However, vehicle maintenance plays an equally critical role in keeping our roads safe. This is especially true around school buses. One often overlooked aspect of vehicle safety is tire maintenance. Properly maintained tires improve driving performance. Most importantly, well maintained tires help prevent accidents. During this important week, ensuring your tires are in good condition is essential for protecting school children and other drivers.
Understanding Tire Wear
Tires will wear down over time. This is due to friction from contact with the road. However, worn tires can significantly reduce a vehicle’s ability to stop quickly or maneuver safely. Worn tires are especially dangerous in wet or slippery conditions. Moreover, this is particularly dangerous when driving near school buses, where sudden stops are common.
Several factors contribute to tire wear, including:
A. Tread Depth
The tread provides the grip that tires need to maintain traction on the road. Therefore, when the tread wears down, your vehicle becomes more prone to skidding. Skidding is more likely in adverse weather conditions. Checking your tire tread regularly ensures they have enough grip to stop safely.
B. Tire Pressure
Under-inflated or overinflated tires can lead to uneven wear. Uneven tires will reduce your control of the vehicle. Additionally, low tire pressure increases the risk of a blowout. So, properly inflating your tires enhances their lifespan and improves vehicle stability.
C. Alignment and Rotation
Misaligned tires or improper tire rotation can cause uneven wear. For example, certain areas of the tire may wear down faster. This, in turn, compromises your ability to stop and steer. Thus, regular tire rotations and alignments help distribute wear evenly. This ensures your tires perform optimally.
Tire Safety and School Bus Zones
Driving in school zones or near school buses requires heightened awareness. Since buses stop frequently and children may unexpectedly cross the street, your ability to stop quickly is crucial. Worn tires can drastically increase stopping distance. An increased stopping distance makes it harder to avoid a collision.
For example, in wet conditions, bald tires are much more likely to hydroplane. Hydroplaning reduces your control of the vehicle. This is particularly dangerous in school zones, where stopping distances are shorter, and unexpected stops are common. Therefore, keeping your tires in good condition improves traction. Better traction means reduced chances of sliding or skidding.
Why Regular Tire Inspections Matter
Regular tire inspections allow you to spot issues before they become serious. During an inspection, our professionals check for:
– Tread Wear:
Ensuring your tires have the proper tread depth is key to maintaining grip. This is especially critical in poor weather conditions.
– Sidewall Damage:
Cracks, bulges, or cuts in the tire’s sidewall can lead to a blowout. A blowout will put you at risk of losing control.
– Tire Pressure:
Proper tire inflation optimizes vehicle performance and safety. Under-inflated tires increase rolling resistance. This in turn makes it harder to stop quickly.
Tire Safety Tips for National School Bus Safety Week
During National School Bus Safety Week, here are some helpful tire safety tips to consider:
A. Perform the Penny Test:
Start by inserting a penny into the lowest tire tread, with Lincoln’s head facing down. If you can see the top of his head, your tread is too low. That means it’s time to replace the tires.
B. Check Tire Pressure Monthly:
Tire pressure naturally decreases over time, especially in colder weather. Keeping your tires inflated to the recommended level extends their lifespan and enhances safety.
C. Rotate Tires Every 5,000
Regular tire rotation helps distribute wear evenly across all tires. This will ensure consistent performance.
D. Be Mindful of Load Limits:
Overloading your vehicle can put unnecessary strain on your tires. Overloading increases the risk of a blowout. So, always be aware of your vehicle’s weight capacity.
In summary, tire safety plays a significant role in protecting school children during National School Bus Safety Week. Drivers are responsible for following traffic laws around school buses, and maintaining your tires is equally important for ensuring road safety. By keeping your tires properly inflated, checking tread wear, and addressing any signs of damage, you can reduce the risk of accidents in school zones and near buses.
Make tire safety a priority, not just during National School Bus Safety Week, but throughout the year. Well-maintained tires help you stop faster, maneuver better, and keep everyone on the road, especially children, safer.
Ensure safe driving with tire inspections, replacements, rotations, and wheel alignments at Temecula Auto Repair & Transmission. Serving Temecula, Murrieta, Winchester, and French Valley, we help keep your tires in top shape for smooth rides and better control. Visit us today to extend your tire life and improve vehicle performance!
3. Maintain Windshield Visibility
Clear visibility is essential when driving around school buses. Ensure your windshield wipers are in good condition and that your windshield is free from cracks or chips. Additionally, keeping your windshield clean also helps reduce glare from the sun, allowing you to see children, school buses, and traffic signs more clearly.
Stay safe with clear visibility by getting windshield replacement, wiper blade replacement, and wiper/washer system repairs at Temecula Auto Repair & Transmission. Proudly serving Temecula, Murrieta, Winchester, and French Valley, we ensure your view stays crystal clear in any weather. Visit us today for expert service that keeps you driving safely!
4. Stay on Top of Fluid Levels
One of the most critical aspects of vehicle care is ensuring that one checks all fluids and tops them off regularly. Vehicle fluids are like the lifeblood of your car. That is, fluids help various systems function smoothly and efficiently. For motorists, maintaining these fluids is crucial, especially when driving near school buses. Most importantly, by keeping your vehicle in optimal condition, you contribute to road safety and help protect school children.
The Importance of Each Vehicle Fluid
Several fluids are vital to the safe operation of your car. Here are some details:
A. Engine Oil
Engine oil lubricates the engine’s moving parts. As oil circulates it reduces friction and prevents overheating. Without it, your engine can suffer significant damage, leading to breakdowns or, worse, accidents. Regular oil checks and changes keep your engine running smoothly. If your car’s engine seizes while driving near a school bus, it could cause a serious hazard on the road.
B. Brake Fluid
Brake fluid transfers the force from your foot on the brake pedal to the brakes themselves. In turn, the hydraulic pressure from the fluid stops your car. Over some time, brake fluid will absorb moisture from the atmosphere. This moisture reduces the brake fluid’s effectiveness. Low or contaminated brake fluid increases the risk of brake failure. This could make it harder to stop quickly in school zones or when a bus stops. Therefore, having your brake fluid checked ensures your braking system functions at its peak.
C. Coolant/Antifreeze
Coolant reduces your engine’s temperature by absorbing heat as it circulates. This prevents the engine from overheating. During hot weather, the coolant absorbs heat from the engine and dissipates it through the radiator. In cold weather, antifreeze keeps the engine from freezing. If the coolant level is too low, your engine could overheat, leading to a breakdown that endangers other drivers and school buses. Thus, regular coolant checks help prevent overheating and maintain your vehicle’s overall performance.
D. Transmission Fluid
Transmission fluid lubricates and cools the gears in your transmission. This allows for smooth shifting and prevents overheating. If the fluid is low or dirty, it can lead to transmission failure or gear slippage. In turn, this makes your vehicle difficult to control. This is especially dangerous in stop-and-go traffic near school buses, where precise driving is needed. Checking and maintaining your transmission fluid ensures smoother driving and safer maneuvers.
E. Power Steering Fluid
Power steering fluid makes it easier to turn your steering wheel. The fluid provides the hydraulic pressure needed for steering assist. Therefore, if the fluid level is too low, steering becomes harder. In turn, it becomes difficult to navigate sharp turns or avoid obstacles. In school zones, where precise and responsive steering is crucial, low-power steering fluid could create unsafe conditions. So, keeping this fluid at the right level ensures better control over your vehicle.
F. Windshield Washer Fluid
While windshield washer fluid may seem less critical, it plays a key role in visibility. Clean windows are essential for seeing school buses, children, and other drivers. Running out of washer fluid could impair your ability to see, especially in bad weather or during early morning school traffic. So, always check your washer fluid level to maintain clear visibility.
Fluid Maintenance and School Bus Zones
Driving in school zones or near buses requires quick response times and full control of your vehicle. Having all your fluids at the right levels ensures that your car can stop, steer, and perform efficiently in any situation. In other words, worn or low fluids increase the risk of mechanical failure. This will put both children and other drivers at risk.
In fact, fluid neglect can lead to sudden breakdowns or dangerous situations. This is especially true in high-traffic areas where school buses operate. To avoid accidents and keep your vehicle in peak condition, it’s important to check all vehicle fluids regularly.
Keep your vehicle running smoothly with fluid checks, fluid replacements, and general maintenance at Temecula Auto Repair & Transmission. Serving Temecula, Murrieta, Winchester, and French Valley, we make sure your car stays in top condition. Schedule your service today for a safer, more reliable ride!
Why Regular Fluid Checks Matter
Regular fluid checks are essential for vehicle safety and longevity. Our Technicians can:
– Inspect fluid levels to ensure they are within the recommended range.
– Identify any leaks or contamination that could impair vehicle performance.
– Recommend fluid flushes or changes based on your vehicle’s condition.
By addressing any issues early, you can prevent major repairs and reduce the risk of accidents. This is especially important during National School Bus Safety Week when road safety is a top priority.
In conclusion, with National School Bus Safety Week 2024 here, it’s the perfect time to make sure you check and maintain your vehicle’s fluids. Each fluid in your car serves a specific purpose in ensuring safety and performance. From engine oil to brake fluid, keeping these fluids at optimal levels can make a significant difference in how your vehicle operates near school buses.
Take the time to get your fluids checked and contribute to safer roads for school children and the community. Proper fluid maintenance will protect your vehicle and protect others on the road as well.
Taking care of your vehicle is a great first step toward safe driving. Additionally, adopting safe driving habits is equally important when sharing the road with school buses:
– Avoid Distractions:
Put down your phone and focus on the road, especially when you see a school bus. Distracted driving is a leading cause of accidents in the United States. See, Distracted Driving, for more on this.
– Be Patient:
School buses operate at slower speeds and make frequent stops. Thus, rushing or trying to pass a bus can lead to dangerous situations. Instead, be patient and allow extra time for your commute.
– Obey Speed Limits:
In school zones and residential areas, speed limits are often reduced to protect children. Make sure to follow the posted speed limits. Be especially careful with your speed when driving near a school or bus stop.
In conclusion, National School Bus Safety Week 2024 is a perfect reminder for all drivers to stay alert and make our roads safer for children. By following traffic laws, maintaining your vehicle, and practicing safe driving habits, you can do your part to ensure students travel safely to and from school. Remember, it only takes one mistake to cause a serious accident. However, with a little extra care and attention, we can prevent them from happening.
Stay safe and help protect the future – our children.
Brakes are the unsung heroes of the automotive world. They silently toil away behind the scenes, ensuring our safety by allowing us to slow down and stop effectively. Maintaining these crucial components in top condition is paramount. A key aspect of brake maintenance involves understanding when to replace brake pads, the components responsible for creating friction to slow down your car. So how often should you replace your brake pads?
The Lifespan of a Brake Pad
Unfortunately, there’s no magic formula for determining brake pad lifespan. Several factors influence how long they last. They usually depend on the following factors:
Driving Habits: City traffic with its frequent stop-and-go nature wears down brake pads considerably faster than highway driving. Every time you press the brake pedal, friction is generated between the pad and the rotor, gradually grinding away the pad material. This wear process accelerates significantly in stop-and-go city traffic.
Vehicle Type: Heavier vehicles like trucks and SUVs require more stopping force, putting a greater strain on the brake pads. This translates to a shorter lifespan compared to lighter sedans or compact cars. The additional weight necessitates more forceful braking to achieve the same stopping power.
Driving Style: Aggressive drivers who favor a heavy foot on the brake pedal and rapid acceleration subject their brakes to immense pressure. This aggressive driving style significantly shortens brake pad life. Conversely, smooth and controlled braking minimizes wear and tear, extending the lifespan of the pads.
Quality of Brake Pads: The material used in the brake pads plays a crucial role in their longevity. Higher-quality, semi-metallic pads tend to last longer than their organic counterparts. However, semi-metallic pads can be harsher on rotors and generate more dust. Choosing the right type of pad for your driving habits and vehicle is essential for optimal performance and lifespan.
While a ballpark estimate suggests replacing brake pads between 25,000 and 65,000 miles, this can be misleading. Focusing solely on mileage ignores the time factor. If you drive a lot, especially in demanding stop-and-go city traffic, your pads could wear out much sooner than 25,000 miles.
Heeding the Warning Signs Your Car Sends
While mileage offers a general guideline, the most effective way to determine brake pad replacement needs is to be attentive to the warning signs your car throws your way. Here are some key indicators that your trusty pads are nearing the end of their service:
Squeaking or Grinding Noises: This is a classic and undeniable sign. When the friction material on your brake pads wears down to a critical point, it exposes a metal wear indicator built into the pad. This metal indicator scrapes against the rotor, producing a high-pitched squealing or grinding noise, a clear message that it’s time to replace brake pads. Don’t ignore this warning – it’s your car’s way of saying it needs attention.
Mushy Brake Pedal: A firm and responsive brake pedal is essential for confident control of your vehicle. If your brake pedal feels soft or spongy when pressed, it could indicate worn-out brake pads or air trapped within the brake lines. In either case, it’s crucial to have your brakes inspected by a qualified mechanic immediately. A mushy pedal can significantly increase stopping distances, compromising your safety.
Vibrations When Braking: Experiencing a vibration in the steering wheel or throughout the car during braking can indicate several issues, including warped rotors or uneven pad wear. While resurfacing the rotors might be an option in some cases, significantly worn pads will necessitate replacement. Vibrations during braking can be a disconcerting experience and should be addressed promptly.
Increased Stopping Distance: This is a critical warning sign you shouldn’t ignore. If it takes considerably longer than usual for your car to come to a complete stop, it’s a strong indication that your brake pads are severely worn and require immediate replacement. This increased stopping distance can significantly elevate your risk of a collision. Don’t wait until it’s too late – have your brakes checked right away.
Brake Pad Warning Light: Many modern cars are equipped with a dashboard light specifically designed to warn drivers of low brake pad thickness. When this light illuminates, it’s a clear and immediate call to action – schedule a brake pad replacement service as soon as possible. Ignoring this warning light can have serious consequences for your safety and the safety of others on the road.
Understanding Brake Rotors
Brake rotors, often referred to as brake discs, work hand in-hand with the brake pads to create the friction necessary to slow down your car. The pads clamp down on the rotors, generating heat that dissipates through the rotors. Generally, rotors are more durable than brake pads and can last between 30,000 and 70,000 miles. However, several factors can influence their lifespan as well:
Heat Management
Excessive heat buildup can cause warping of the rotors, leading to vibrations during braking. This warping can occur due to aggressive driving habits, towing heavy loads, or worn-out brake pads that make contact with the rotor for a longer duration.
Rotor Material Composition
Rotors are typically constructed from cast iron, but some high-performance vehicles might utilize rotors made from lighter yet more expensive materials like carbon fiber or ceramic. These alternative materials offer better heat dissipation but come at a premium cost.
Minimum Thickness Requirement
Just like brake pads, rotors have a minimum thickness requirement specified by the manufacturer. Operating with rotors below this minimum thickness can compromise braking performance and become a safety hazard.
Glazed Brakes
In some instances, you might encounter a condition known as glazed brakes. This occurs when extreme heat causes a hardening of the brake pad surface, reducing its friction coefficient. The result is a noticeable decrease in braking performance, making it difficult to slow down the car effectively. This situation can arise from repeated hard stops or riding the brakes downhill for extended periods.
Preventive Maintenance
Don’t wait until you experience warning signs before getting your brakes checked. It’s recommended to have your brakes inspected by a qualified mechanic every 12,000 miles or annually, whichever comes first. This routine maintenance helps ensure your brakes are in good condition, preventing costly repairs down the road and more importantly, safeguarding you and your passengers on the road.
Partnering with a Trusted Repair Shop for Optimal Brake Service
Keeping your car’s brakes in top shape requires expertise and the right tools. For a comprehensive brake inspection and to ensure your car is stopping safely, consider scheduling an appointment with a trusted repair company like Temecula Auto Repair & Transmission.
With over 100 years of combined experience, their certified technicians possess the knowledge and expertise to diagnose any brake problems you might be facing. They can recommend the appropriate service, whether it’s a simple brake pad replacement, rotor resurfacing, or a more complex repair.
Temecula Auto Repair & Transmission prioritizes customer satisfaction and uses high-quality parts, ensuring you receive the best possible service. They are confident in working on all types of vehicles, from classics to high-performance cars, so you can be confident they can handle your specific needs in Temecula.
Don’t hesitate to contact Temecula Auto Repair & Transmission today. Together they’ll work to ensure your brakes are functioning optimally, keeping you safe and your car running smoothly for miles to come. Remember, properly maintained brakes are a high priority for a safe and enjoyable driving experience.
As summer heats up, ensuring your vehicle’s air conditioning system is functioning at peak performance becomes essential for comfort and safety. Auto AC systems have evolved significantly, and understanding how they work can help you maintain them effectively. In this guide, we will delve into the mechanics of auto AC systems, common problems, and tips for maintenance, all while highlighting when professional help is necessary.
How Auto AC Systems Work
Auto AC systems cool the cabin and reduce humidity to create a comfortable environment in your car. The core process involves circulating refrigerant through a closed system, which absorbs heat and releases it outside, leaving the cabin cool and dehumidified.
The main component responsible for cooling is the evaporator, located behind your vehicle’s dashboard. As air passes through the evaporator’s fins, it cools down and flows through your vents. At the same time, the evaporator removes moisture from the air, contributing to a more comfortable ride by dehumidifying the cabin.
The Role of Refrigerant in Auto AC Systems
Refrigerant is the lifeblood of auto AC systems. It circulates within the system, alternating between liquid and gas states to absorb and release heat. Modern vehicles typically use refrigerants such as R-134a and 1234yf.
Remember that auto AC systems are closed systems, so they should not lose refrigerant unless they develop a leak. This is why regular “recharging” is not a typical maintenance task; if your system needs more refrigerant, there is likely a more significant issue.
Essential Components of Auto AC Systems
Understanding the various components of auto AC systems can help you diagnose issues early on:
Compressor: The compressor is the heart of the AC system. It compresses the refrigerant, which leaves the compressor as a high-pressure gas before entering the next stage of cooling. This process is crucial for maintaining the right pressure and temperature within the system.
Condenser: Located near the grille of your car, the condenser transforms the high-pressure gas into a liquid by releasing heat. Air flowing through the condenser as you drive, along with the radiator fan, helps facilitate this cooling process.
Receiver-Drier: This component acts as a filter, removing moisture and impurities from the refrigerant. It helps prevent damage to other components in the system by ensuring that the refrigerant is in the correct state for cooling.
Orifice Tube or Expansion Valve: Depending on the vehicle, refrigerant either passes through an orifice tube or an expansion valve before reaching the evaporator. This process regulates the flow of refrigerant to ensure efficient cooling.
Evaporator: The evaporator is located inside your dashboard and is where the cooling magic happens. As the refrigerant moves through the evaporator, it absorbs heat, causing the air blown by the blower motor to come out cold through your vents. Additionally, the evaporator helps dehumidify the air by removing excess moisture from the cabin.
Common Problems in Auto AC Systems
Several common problems can arise in auto AC systems, with leaks being the most frequent issue. Many drivers mistakenly believe that if their AC isn’t blowing cold air, all it needs is a refrigerant recharge. However, since auto AC systems are sealed, refrigerant loss indicates a leak.
Leaks can be challenging to detect, especially if they are small. When you bring your vehicle in for a repair, technicians typically replace the system’s Schrader valves, recharge the system, and introduce a dye to help locate any remaining leaks. Schrader valves are a vulnerable part of the system and are often the source of leaks.
Other common problems include compressor failures and clutch issues. The clutch is a component that engages and disengages the compressor, cycling it on and off as needed. If the clutch or compressor fails, the entire system can malfunction, resulting in warm air blowing through the vents.
Unusual Auto AC System Issues
Occasionally, you may encounter less common problems with your auto AC systems. For example, in vehicles with dual climate control, where you can set different temperatures for the driver and passenger sides, one side may blow cold air while the other blows hot. This issue is often due to a malfunctioning blend door actuator. The blend door is a flap that directs air to either the heater core or the evaporator, depending on your temperature setting. When this part malfunctions, it can cause the wrong temperature air to flow out of the vents, even when you’ve set both sides to cool.
Maintenance Tips for Auto AC Systems
Maintaining auto AC systems doesn’t have a strict schedule like oil changes, but periodic checks are essential. Here are a few maintenance tips:
Visual Inspection: Periodically look under the hood at the AC lines. If you notice oil residue on the lines, it may indicate a slow leak that requires attention.
Professional Inspection: When you bring your car in for routine maintenance, a quick check of the AC system is advisable. Technicians can ensure that the system is functioning properly and identify any potential issues before they become significant problems.
Quick Response to Issues: If your AC system stops blowing cold air, it’s essential to get it repaired promptly. A refrigerant leak can cause further damage if left unchecked, as components not designed to operate without refrigerant could fail.
When to Seek Professional Help for Auto AC Systems
Knowing when to seek professional help is key to preserving the life of your auto AC systems. If you notice any of the following, it’s time to bring your car in for a check-up:
Warm air: If the AC is blowing warm air instead of cold, it indicates a problem with refrigerant levels, the compressor, or another component.
Strange Noises: Unusual sounds when the AC is running could signal a problem with the compressor or other mechanical issues.
Foul Smells: A foul smell could be caused by mold or mildew in the system. This is not only unpleasant but can also be harmful to your health.
Leaks: Moisture leaking from the AC system should be investigated immediately, as it could indicate a larger issue.
Timely repairs can prevent more extensive damage and keep you cool on the road.
The Importance of Timely Repairs
Ignoring problems in auto AC systems can lead to costly repairs. For instance, running your system without refrigerant can damage the compressor and other essential components, leading to more expensive fixes. Regular inspections and prompt attention to any issues will help maintain your vehicle’s comfort and prevent further complications.
Maintain Your Auto AC Systems At Temecula Auto Repair & Transmission
If you’re experiencing any issues with your auto AC systems, don’t delay. Timely repairs can save you from more expensive fixes down the line. At Temecula Auto Repair & Transmission, our expert technicians are trained to diagnose and repair all aspects of auto AC systems. Whether you’re dealing with leaks, compressor issues, or unusual noises, we’re here to help. Give us a call at (951) 699-3332 or. Stay cool and comfortable on the road with our reliable service!
Classic cars are treasures of automotive history, embodying elegance, style, and a bygone era’s engineering marvels. The definition of a classic car can vary widely, depending on who you ask.
Generally, many people consider any vehicle older than 25 years to be a classic. However, more stringent definitions exist. For example, the Classic Car Club of America defines a classic car as any fine or distinctive automobile built between 1915 and 1948. Other organizations, like the National Corvette Restorers Society, judge Corvette model years 1953 to 2004 for Flight Awards. Essentially, one may deem any distinctive and older car a classic. Some even consider newer models as future classics based on their unique characteristics and potential for collectible status.
From a mechanical perspective, Temecula Auto Repair views classic cars as those with non-computerized systems, relying more on mechanical devices than electronics. These vehicles require special care, including considerations for the type of gasoline used. Some enthusiasts prefer leaded gas, which is scarce and mostly found at airports or racetracks. Additionally, many classic cars spend considerable time in storage. To preserve the engine, it’s recommended to use oil that contains zinc.
Common Issues in Classic Cars
Classic cars often face unique challenges. One common problem is the deterioration of materials. Cars that have been sitting for extended periods may experience issues with rubber components, such as seals on windows or, more critically, engine gaskets. These can dry up and cause oil leaks, which are notoriously difficult to fix. Metal components, including brakes and water pumps, can also rust over time. Preventing deterioration of the parts will lead to a lot of savings down the line.
Parts Availability and Repair Challenges
Repairing classic cars can be challenging due to parts availability. Popular models like Chevys, Fords, Mustangs, and Corvettes generally have abundant parts available, whether original or good reproductions. However, rarer models, such as older Mercedes-Benz vehicles, may require more time to source parts.
Repairing these vehicles also involves precise adjustments, often guided by manuals and specifications. Here at Temecula Auto Repair, we have an extensive library of information, allowing our experts to make accurate adjustments and keep classic cars running smoothly.
Maintenance: Key to Longevity
Maintenance is crucial for any vehicle, and classic cars are no exception. Historically, classic cars required more frequent maintenance, such as oil changes every 3,000 miles. When storing a classic car and not driving it often, it’s essential to change fluids based on time rather than mileage.
For example, we recommend oil changes every 6 to 9 months, and coolant should be replaced every two years to prevent corrosion. Regularly starting and driving the car, even if only around the block, can help circulate vital fluids and prevent issues like rusty brakes and out-of-tune engines.
Repairing and Restoring Classic Cars
The approach to repairing or restoring a classic car depends on the owner’s intentions. Some may seek minor repairs for a driver vehicle, while others may desire a full restoration. Temecula Auto Repair begins by understanding the owner’s goals. For instance, a 1965 Corvette in our shop was undergoing a full restoration, including addressing rust issues in the seat frames and reupholstering them. Whether it’s a minor repair or a complete overhaul, our team tailors the services to fit each customer’s needs.
Recent Projects: Success Stories
Temecula Auto Repair has worked on numerous classic cars, each with its own story. A 1967 L71 Big Block Corvette came to us not running. The team rebuilt the carburetors, changed all fluids, and prepared it for auction, resulting in a successful sale. A 1969 Pontiac Firebird, used occasionally by its owner, was fine-tuned to run flawlessly, bringing immense satisfaction to the owner. Another memorable project involved a 1958 Pontiac Bonneville with a transmission issue. The transmission was rebuilt, and additional repairs were made, leaving the owner thrilled with the car’s performance.
Originality vs. Modification
Deciding between restoring a car to its original state or modifying it depends on various factors, including the car’s current condition and the owner’s preferences. Originality can preserve the car’s value, especially if it’s a numbers-matching model.
On the other hand, modifications can modernize the car, making it safer and more enjoyable to drive. Disc brakes, for example, offer improved performance over drum brakes. Temecula Auto Repair provides expert advice, helping customers make informed decisions while respecting the customer’s preferences.
Expertise and Passion
The staff at Temecula Auto Repair are not only experts but also passionate enthusiasts of classic cars. With years of experience and a deep understanding of these vehicles, we offer unparalleled service. Our extensive knowledge, coupled with access to original equipment manufacturer (OEM) parts and detailed manuals, ensures that every classic car receives the best possible care. Our library of resources includes service manuals and judging guides, which are invaluable for maintaining the originality and performance of classic cars.
Comprehensive Services
Temecula Auto Repair offers a full range of services for classic cars, from routine maintenance and minor repairs to full restorations. We understand that no two cars or customers are alike, and we tailor our services to meet individual needs. Whether it’s a quick fix or a comprehensive restoration, our team is equipped to handle any challenge.
Classic Car Auto Repair With Temecula Auto Repair & Transmission
If a classic car requires maintenance, repair, or restoration, Temecula Auto Repair is the ideal destination. With a team of passionate experts and a wealth of resources, we ensure that each vehicle receives the meticulous care it deserves. Temecula Auto Repair offers a range of services tailored to meet individual needs, whether it’s routine maintenance, intricate repairs, or full restorations.
Our dedication to preserving the originality and performance of classic cars is unmatched, and our commitment to customer satisfaction is evident in every project we undertake. For inquiries or to schedule an appointment, classic car owners can call (951) 699-3332. Temecula Auto Repair stands ready to help maintain and enhance the timeless beauty and functionality of classic vehicles, ensuring they remain roadworthy and cherished for years to come.
We use cookies to improve your experience on our site. By using our site, you consent to cookies.
This website uses cookies
Websites store cookies to enhance functionality and personalise your experience. You can manage your preferences, but blocking some cookies may impact site performance and services.
Essential cookies enable basic functions and are necessary for the proper function of the website.
Name
Description
Duration
Cookie Preferences
This cookie is used to store the user's cookie consent preferences.